


Print reports can contain spreadsheet information, graphic views, detail reports for specific members and load combinations, and external images such as hand calculations, title pages, etc. When in a model view, you will notice a button with an image of a camera on it in the toolbar:
This is the Snapshot tool that will allow you to take a screenshot of the current view which will be saved to your computer as a .png file.
After clicking this button, the following dialog box will be displayed:
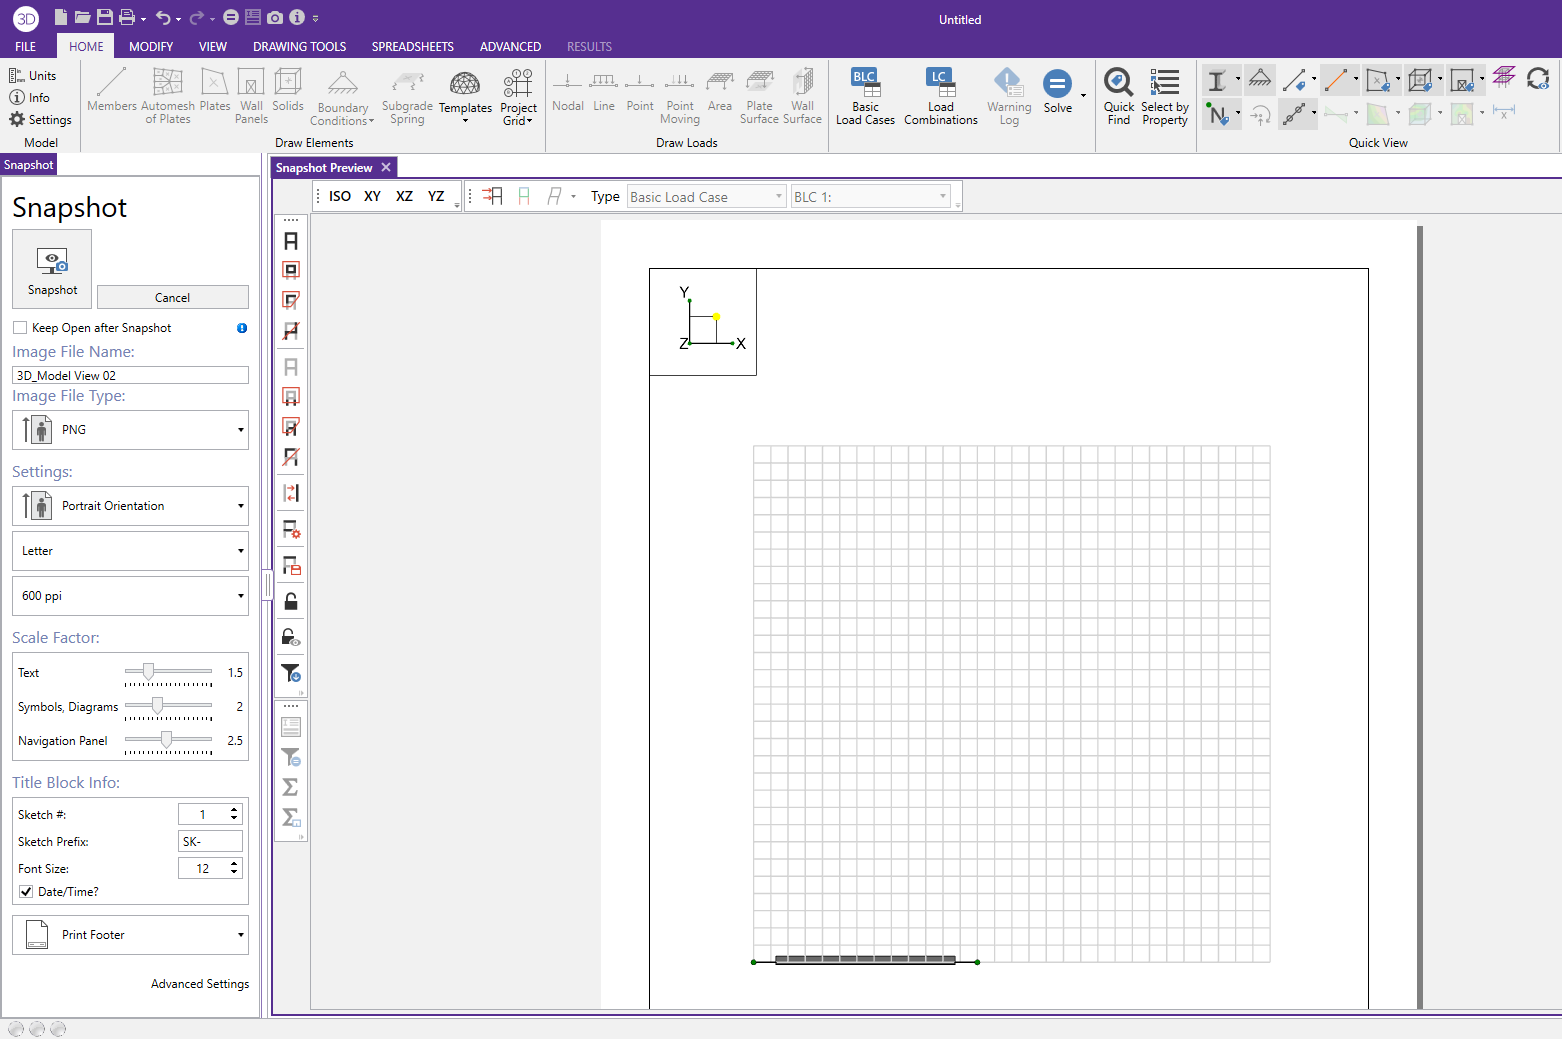
Adjusting the scale factor sliders will either increase or decrease the size of text or other graphical elements. The Sketch # will increase by a factor of 1 each time a snapshot file is saved and will be available with the Sketch Prefix in the file title bar. The Print Footer drop down menu will allow you to choose whether you want a footer, footer with comments or no footer at all . You have the ability to add additional information to the footer by typing in the Additional Comments section after you have selected "Print Footer with Comments" from the drop down menu.
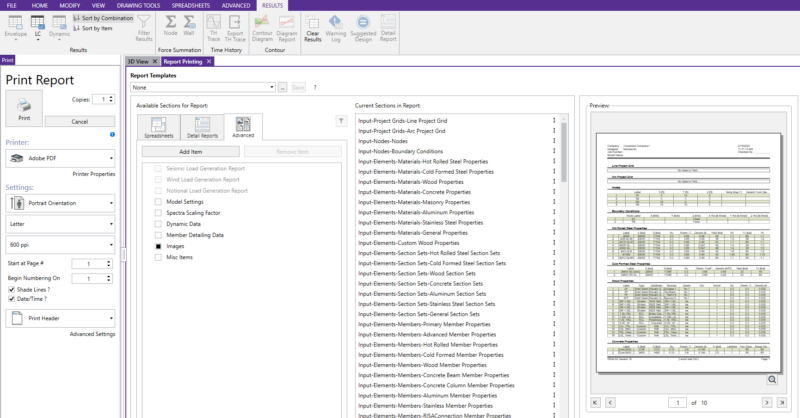
After all information is set, click the Snapshot button to save the file as a .png to your computer. The file will automatically be saved into an Images folder created in the same location where your model is currently saved. The image files will be listed under the Advanced tab of the Print Report interface under the Images checkbox. Check their boxes to include them in the Current Sections in Report.

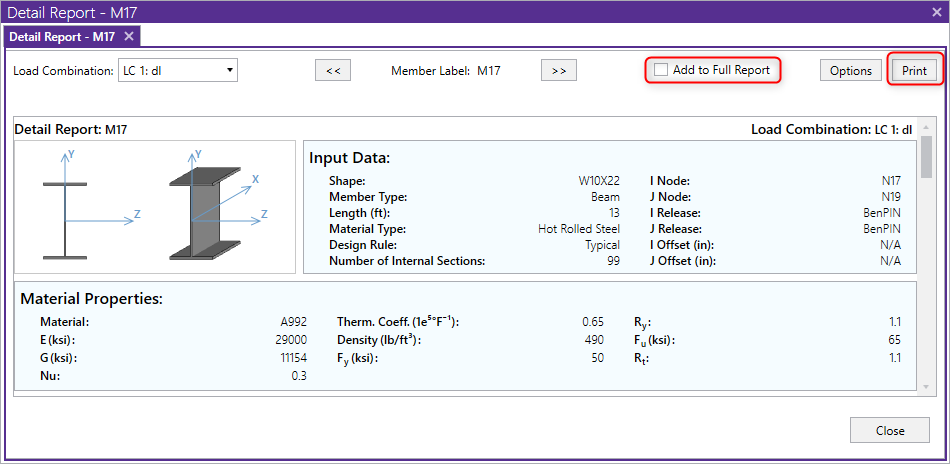
The Add to Full Report checkbox and Print button is available after running an analysis in the Detail Reports:
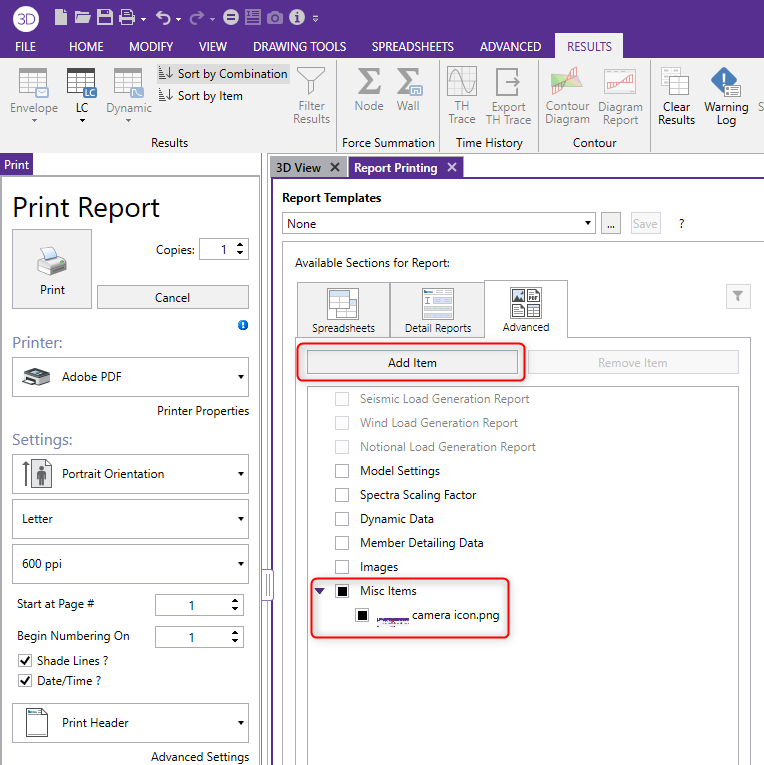
Lastly, if you have external .png, .pdf, or .jpeg files (i.e. cover sheet, calculation pages, etc.) that you would like to include in your report as well, you can click the Add Item button in the Advanced tab in the Print Report interface. Once you have imported the item, it will be located under the Misc Items checkbox in the Advanced tab. Simply check the box next to the item to include it in your print report.