


RISA includes various advanced spreadsheet operations that make reviewing input and results easy.
The features that we will focus on are available in the "Spreadsheet" tab located in the ribbon toolbar whenever a spreadsheet is open as well as by right-clicking in the table.

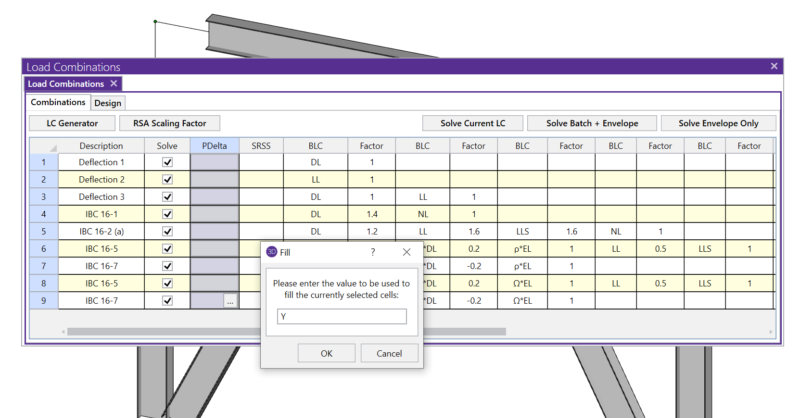
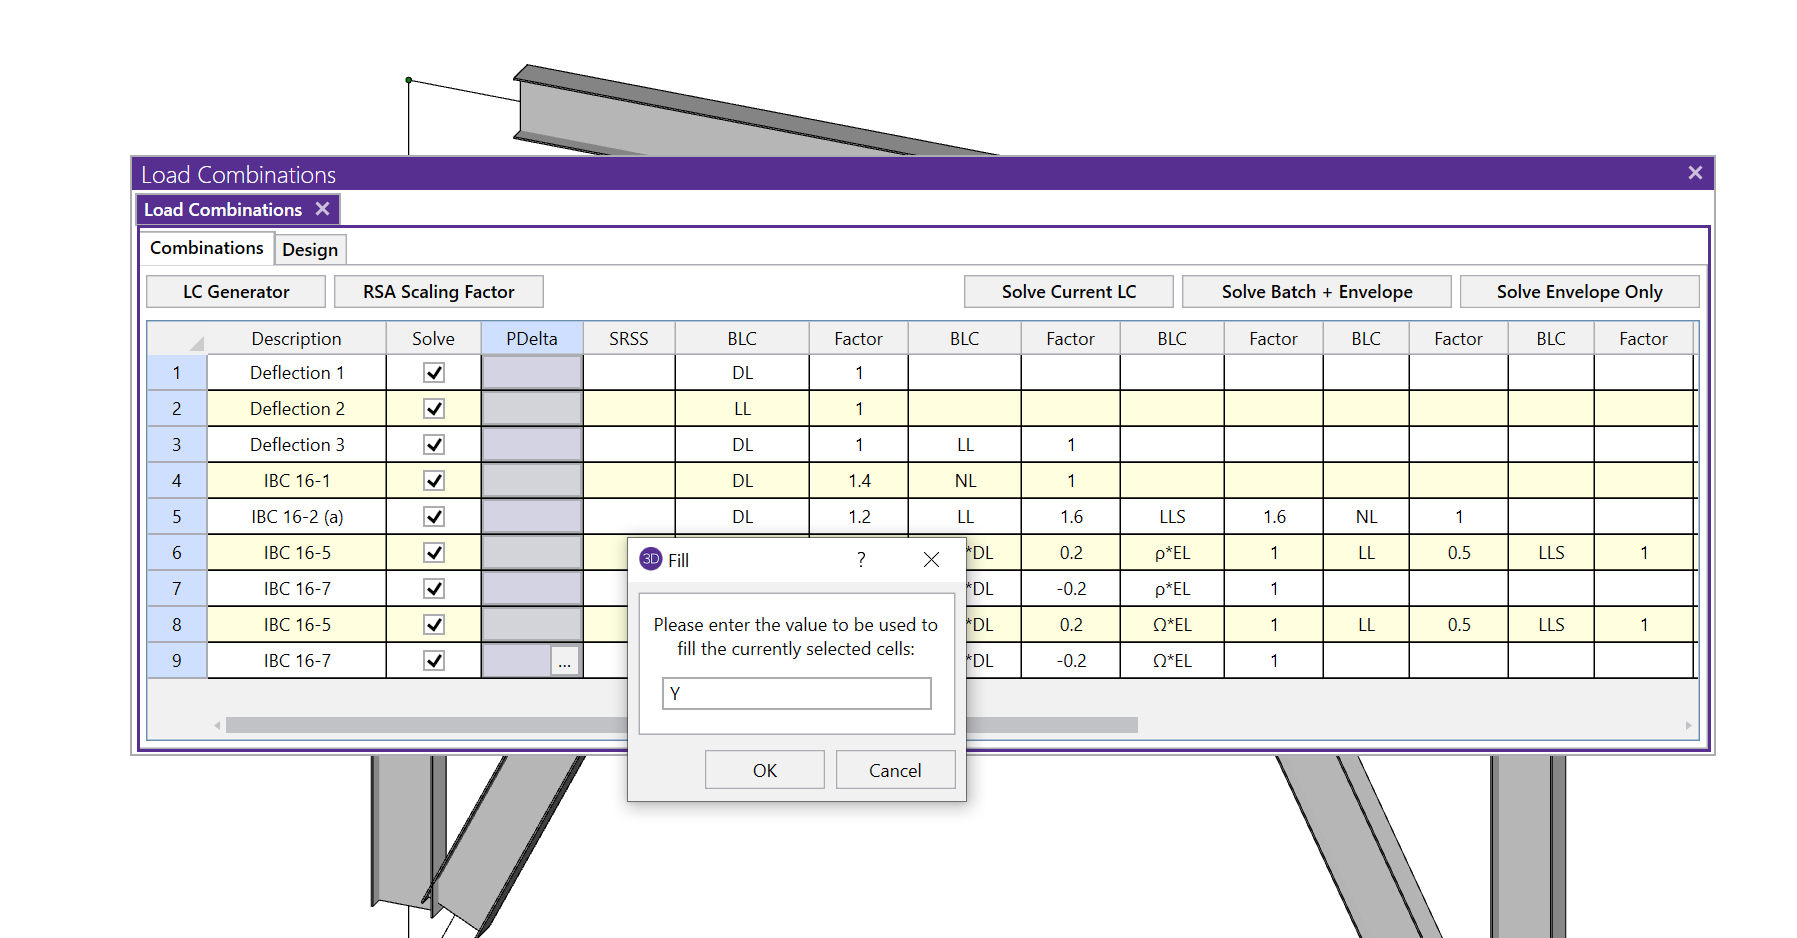
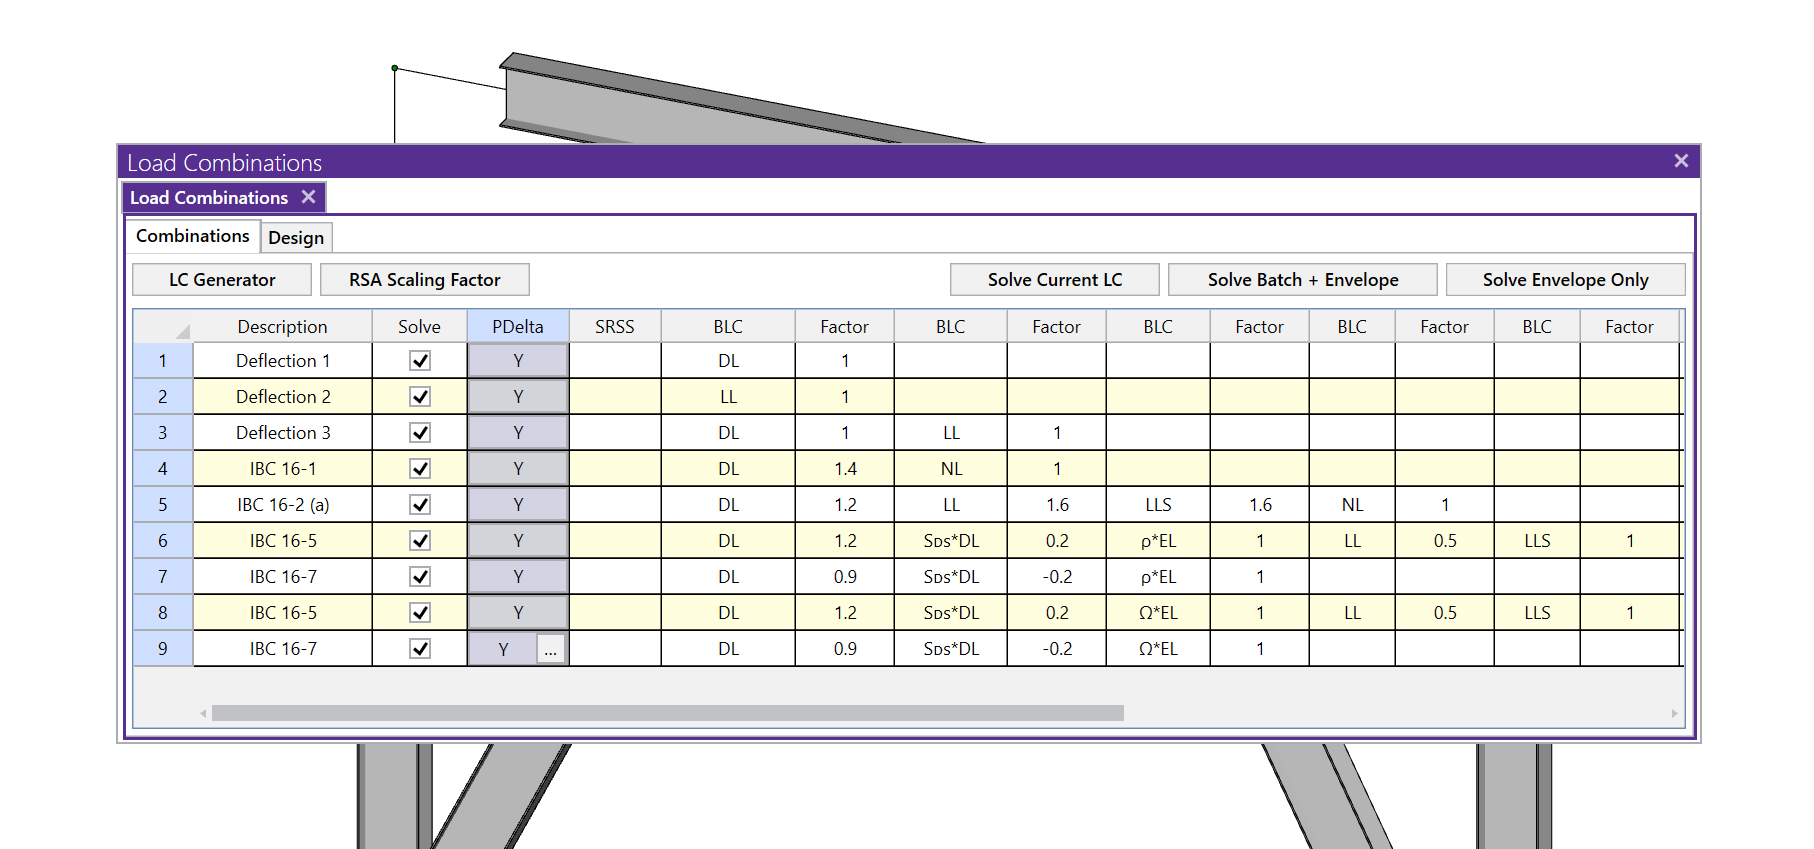
P-Delta analysis is required in the AISC code, and it is something that you must specify on a per-load-combination basis. This is done by typing the letter Y in the P-Delta column of the Load Combinations spreadsheet. For those who aren’t familiar with the spreadsheet tools this can be a tedious task of typing the letter into every load combination.
Instead, try doing this: click on the header of the P-Delta column to highlight the entire column in pink, click on the Block Fill button (the one on the right highlighted above) and have the program fill the block (group of currently selected cells) with the letter Y.
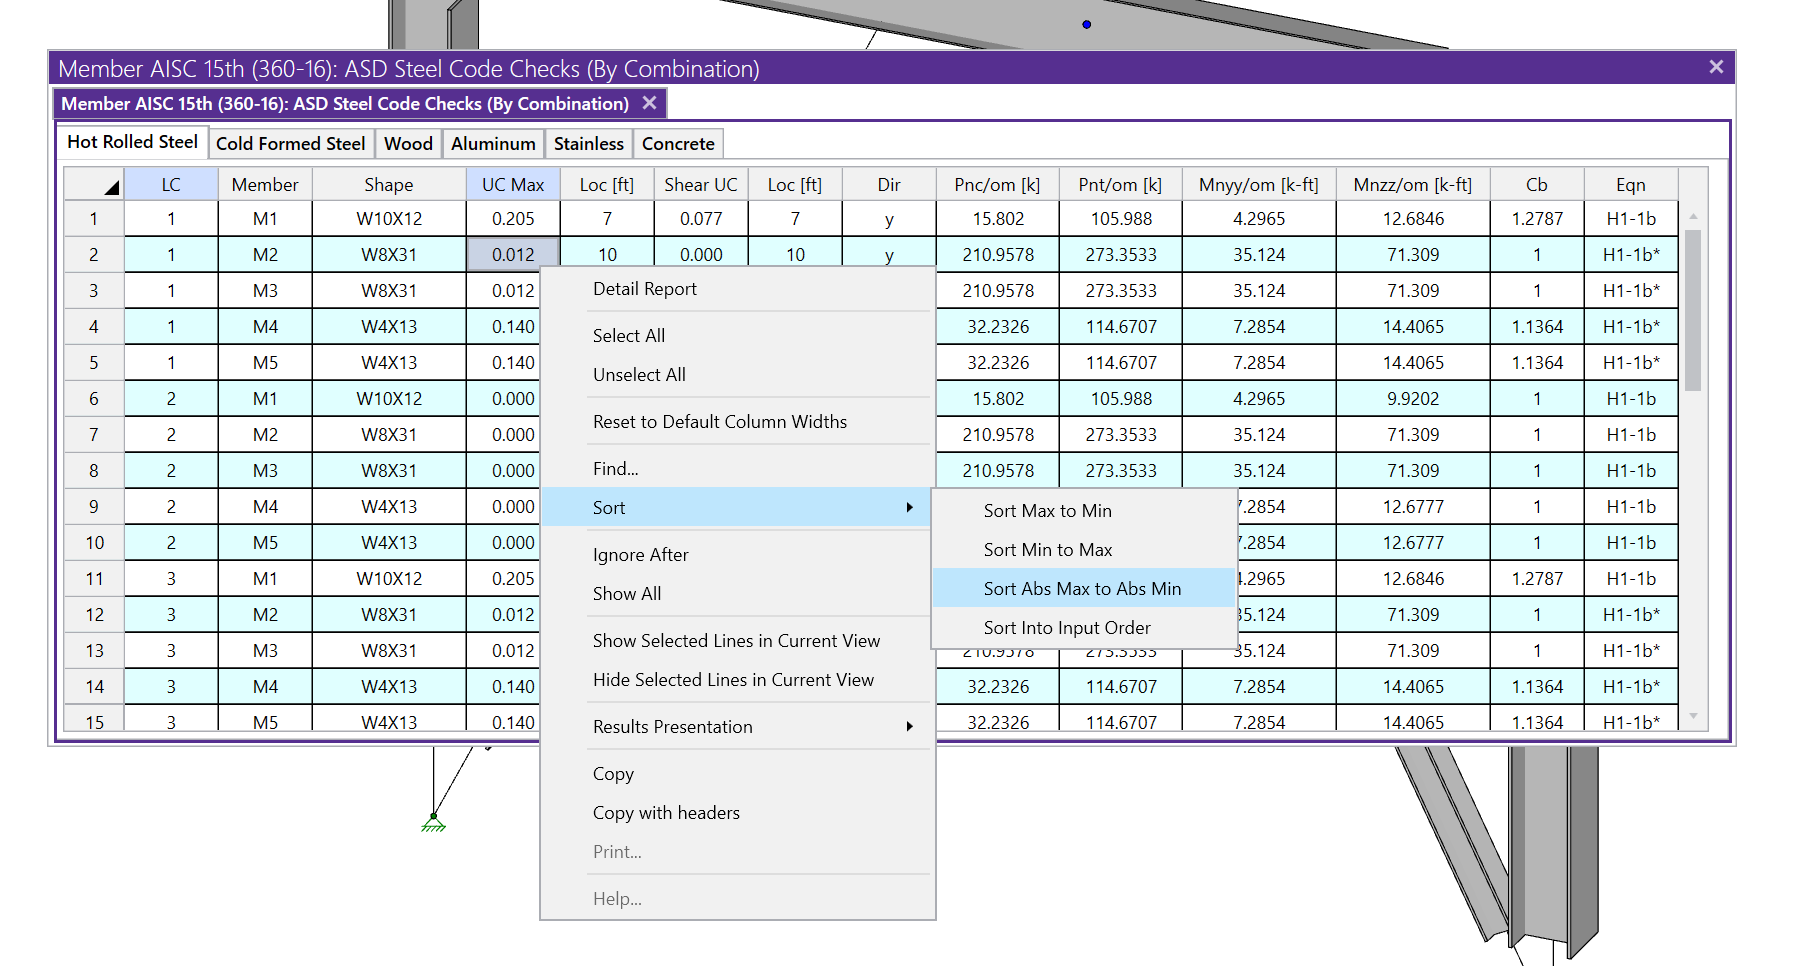
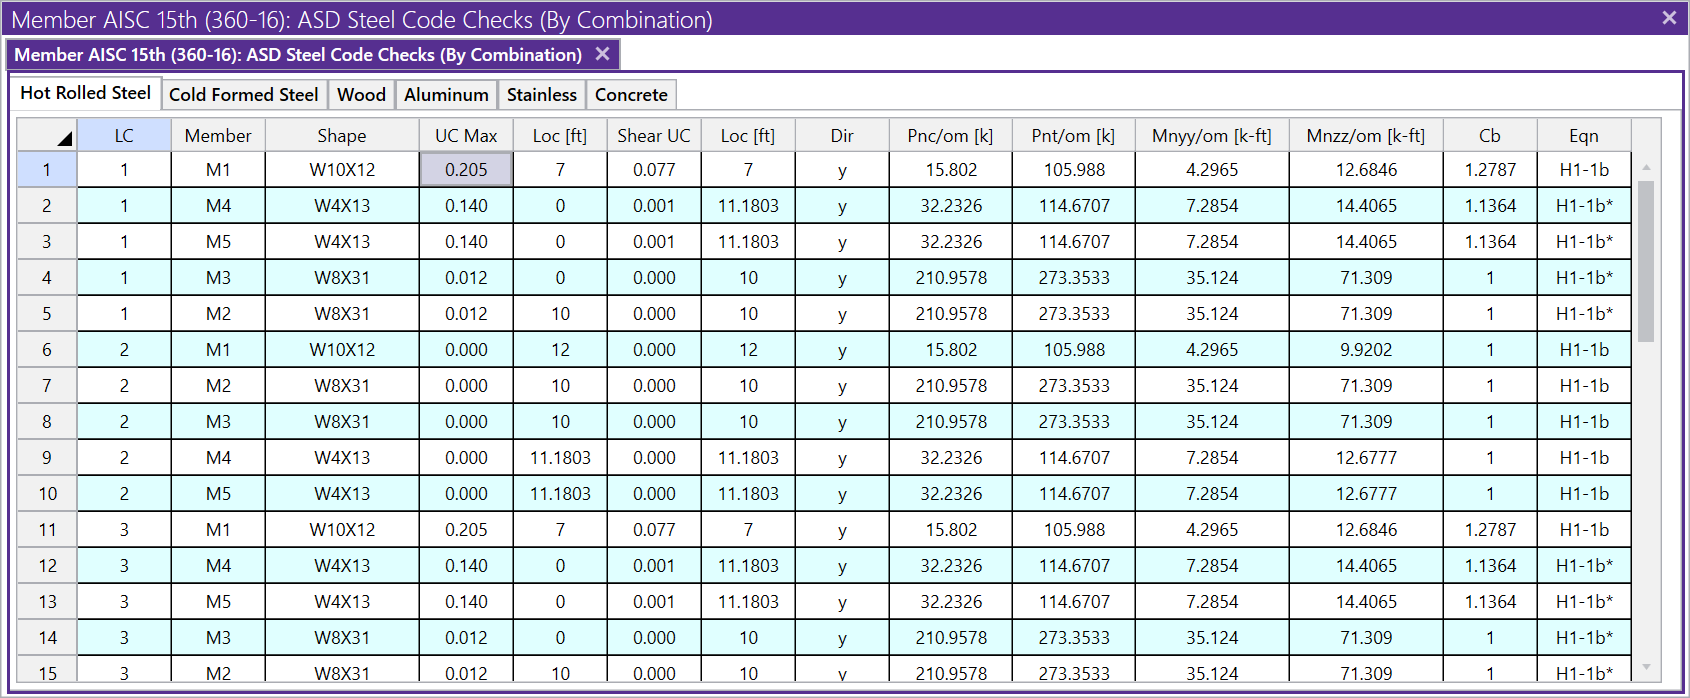
Now let’s say that you’ve got a solution and you want to review your results, however you may have quite a few members to sort through. You want to quickly see which one has the worst case unity check.
If you open up your Design Results spreadsheet you will be confronted with a large amount of data. Click on the header of the UC Max column to highlight the entire column in pink, then click on the Sort button (the one on the left highlighted above) and have the program sort that column Max to Min. You will quickly see which member controls your design, and by how much.