Click the File ribbon and choose Export.
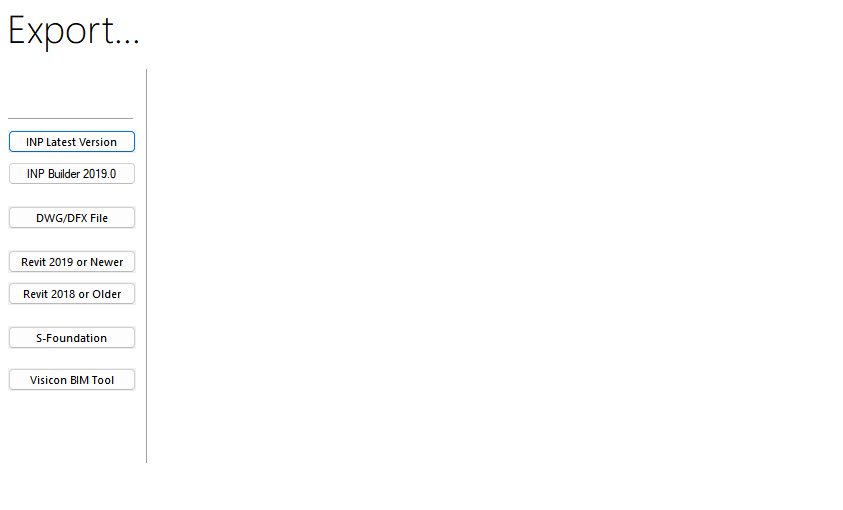
An export panel opens.

Click the type of file you want to export to.
| File Type | Description |
|---|---|
| INP Latest Version | Used to update or create an ADAPT-Builder .adm from INP file. |
| INP Builder 2019.0 |
Used to update or create an ADAPT-Builder .adm from INP file. |
| DWG/DXF File |
Used to export drawing data from ADAPT-Builder to a DWG/DFX file. |
| Revit 2019 or Newer | Used to create a new Revit .rvt file from the ADAPT-Revit Link 2019 or later versions. |
| Revit 2018 or Older | Used to create a new Revit .rvt file from legacy ADAPT-Revit Link versions prior to ADAPT-Revit Link 2019. |
|
S-Foundation |
Used to export loading and reaction data to S-Foundation. |
|
Visicon BIM Tool |
Used to create a new Visicon model for BIM coordination. |
Follow the step(s) that coincide with your export choice:
-
If you chose INP Latest Version, INP Builder 2019.0, Revit or Visicon BIM Tool, a Save As window opens.
-
Locate the folder in which you want to save the file.
-
Type a name for the exported file.
-
Click Save to start the export.
-
-
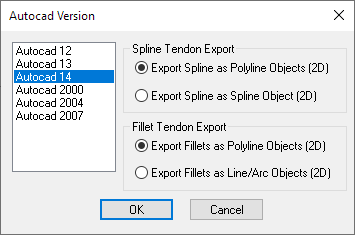
If you chose DWG/DXF File, an Autocad Version window opens.
Note: These same steps can be followed when you select to Export to DWG from the Reports ribbon.
-
Click on the Autocad version that you want the file format to adhere to.
-
Choose the Spline Tendon Export option that coincides with the preferred linetype to be used in the DWG/DXF file for spline tendons.
-
Choose the Fillet Tendon Export option that coincides with the preferred linetype to be used in the DWG/DXF file for fillet tendons.
-
Click OK.
An Export a DXF or DWG File Autocad [version you selected] window opens.
-
Locate the folder in which you want to save the file.
-
Type a name for the exported file.
-
Click Save to start the export.
-
-
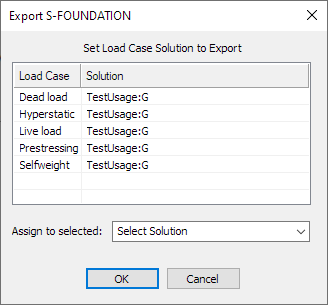
If you chose S-Foundation, an Export S-FOUNDATION window opens.

-
To change the Solution for which you will export loads for any load case:
-
Click on the Solution column of the load case row to extend a list of options.
-
Click on the Solution column of the load case row and select the solution you want to use. Default options are:
-
Uncracked:G
-
Uncracked:L
Note: User entered usage cases are listed here as well. -
-
-
To assign all the load case objects to a single solution, click the Assign to selected arrow and select the solution. If you want each to export to the solution listed for it, or if you have selected different solutions for some of the objects, skip this step.
-
Click OK.
A Save As window opens.
-
Locate the folder in which you want to save the file.
-
Type a name for the exported file.
-
Click Save to start the export.
-