Click on the Label at the top of the panel to select it.

Click on image to enlarge
Click and drag the panel to where you want to place it on your desktop, then drop it.
In ADAPT-Builder, you have the ability to float, dock or hide several of the panels that by default are docked to either the left side or right side of the model editor panel. Some examples are the Properties Grid, Colorize Grid, Visibility Grid and Results View panels. The panels are interchangeable, meaning that they can be moved in and out of a grouped panel set or you can create a grouped panel out of a stand-alone panel by docking other panels with it. These features allow you to move the panels where they are most convenient for you, group as you see fit, and hide them when not in use so you have more space to work on a model. Each panel can be docked, floated or hidden independently of each other, or all together when they are within a grouped panel set.
The Float feature allows you to place a panel anywhere on your desktop as an independent, floating window.
There are three methods you can use to float a panel; dragging it by its heading label, dragging it by its tab, or using a right-click menu. The methods available for use depend on whether the panel is a:
Grouped Panel - A single panel that contains a grouping of individually tabbed panels.
Tabbed Panel - An individual panel within a grouped panel, indicated by its tab at the bottom of the grouped panel.
Stand-Alone Panel - A panel that is not enclosed in a grouped panel.
You can use the following table to determine what method you want to use.
Applicable Panel Floating Methods
| Panel Type | Float by Dragging Heading Label | Float by Dragging Panel Tab | Float by Right-Click Menu |
|---|---|---|---|
|
Grouped Panel |
ü |
— |
— |
|
Tabbed Panel |
— |
ü |
ü |
|
Stand-Alone Panel |
ü |
— |
ü |
This method can be used to float a grouped panel or a stand-alone panel. It cannot be used for individually floating a tabbed panel.
To float a panel by dragging on its heading label:
Click on the Label at the top of the panel to select it.
Click on image to enlarge
Click and drag the panel to where you want to place it on your desktop, then drop it.
This method can only be used to float a single tabbed panel. It cannot be used to float a grouped panel set or a stand-alone panel.
To float a panel by dragging its tab:
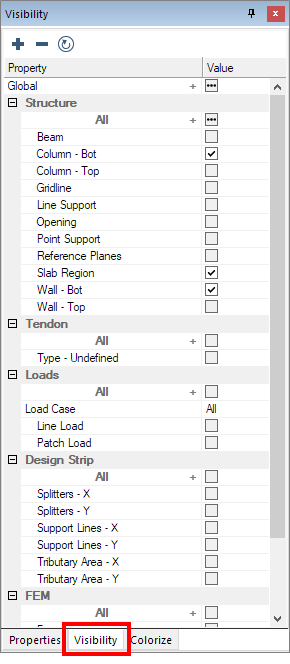
Click on the tab of the panel you want to float. In our example, we opened the Visibility Grid.
Click on image to enlarge
Drag on the tab to move the single panel out of its current location and drop it anywhere on your computer's desktop (as shown in the following image).

Click on image to enlarge
To reinsert the floating panel into the main set of docked panels, see Drag and Drop by a Panel's Heading Label.
This method can be used to float a tabbed panel or a stand-alone panel. It cannot be used to float a grouped panel.
To float a panel using the right-click menu:
Click on the tab of the panel you want to float.
In our example we clicked on the Properties grid tab.
Right-click on the Heading Label at the top of the panel, to open a menu.

Click on image to enlarge
Choose Floating from the menu.
The panel is detached from its docked position.
Drag the panel to where you want to place it on your desktop and drop it.
The Dock feature can be used to re-dock a floated panel or to merge panels together either in a tabbed layout or stacked side-by-side or top-to-bottom layouts. These docking capabilities can be accomplished using one of three methods; dragging by heading label, dragging by a panel's tab or using a right-click menu. All three methods allow you to choose the dock layout you want, rather it be docking the panel within a merged tabbed panel set or docking it to a position (left, right, top or bottom) inside or outside of any panel currently displayed in the program's work area. As you drag a panel to either re-dock it or merge it with another panel, several icons appear showing you the positions you can choose from. The location of the icons indicate where the floated panel will be positioned in relation to the whole work area panel or the panel being hovered over. The following image shows the various docking icons, while the following table describes their results.
![]()
Click on image to enlarge
Docking Icons
| Icon | Function | Description | |||||||||||||||
|---|---|---|---|---|---|---|---|---|---|---|---|---|---|---|---|---|---|
|
Free-Standing Icons |
|||||||||||||||||
|
|
Dock Far Left in Work Area |
Docks the floated panel to the left inside position of the work area, but outside all other panels open in the work area. |
|||||||||||||||
|
|
Dock Far Right in Work Area |
Docks the floated panel to the right inside position of the work area, but outside all other panels open in the work area. |
|||||||||||||||
|
|
Dock to Top in Work Area |
Docks the floated panel to the top position inside the work area, but outside of all other panels open in the work area. |
|||||||||||||||
|
|
Dock to Bottom in Work Area |
Docks the floated panel to the bottom inside position of the work area, but outside all other panels open in the work area. |
|||||||||||||||
|
Grouped Icons |
|||||||||||||||||
|
|
Dock Within a Grouped Panel or Merge With a Panel |
Allows you to select a position to dock the floated panel to that is inside of the panel currently being hovered over. This grouping includes a "tabbed" position that is available when docking within most panels, except for the model editor panel.
|
|||||||||||||||
|
|
Dock Within a Panel |
This grouped set of icons work exactly the same as the above, though they only apply to the model editor panel and they do not include the tabbed icon because you cannot turn the model editor panel into a tabbed panel.
|
|||||||||||||||
In order to dock a panel, it must be currently floating. Therefore, if you want to move a currently docked panel to another position or merge it with another grouped panel set or stand-alone panel, you must first float the panel you are moving. As with floating a panel, there are three methods you can use to dock a panel to another position; dragging and dropping by its heading label, dragging and dropping by its tab, or using its right-click menu. The methods available for use depend on whether the panel is a:
Floating Panel - A single panel or grouped panel set that is currently floating on the desktop.
Docked Tabbed Panel - An individual panel that is currently docked in a grouped panel set, indicated by its tab at the bottom of the merged panel.
Docked Stand-Alone Panel - A panel that is not enclosed in a merged panel but is currently docked by itself in a different position from where you want to dock it.
You can use the following table to determine what method you want to use.
Applicable Panel Docking Methods
| Panel Type | Drag and Drop by Heading Label | Drag and Drop by Panel Tab | Dock Using the Right-Click Menu |
|---|---|---|---|
|
Floating Panel |
ü |
— |
ü |
|
Docked Tabbed Panel |
— |
ü |
— |
|
Docked Stand-Alone Panel |
ü |
— |
— |
This method can be used to accomplish any of the following tasks:
Dock a single floated panel into a grouped panel.
Dock a floated grouped panel to its original position.
Dock a floated grouped panel to a different position
Merge a stand-alone panel into a grouped panel.
Merge a floated grouped panel with another grouped panel.
Merge a floated panel with a stand-alone panel to create a new grouped panel set.
Move any stand-alone docked panel to a different docked position.
To dock a panel by dragging it's heading label to a position icon:
Click and drag on the floating or stand-alone panel's heading label and drag it until you see the position icons in the panel where you want to dock it.
Click on image to enlarge
Drag the panel so that your mouse pointer is directly over the icon that represents the position you want to use.
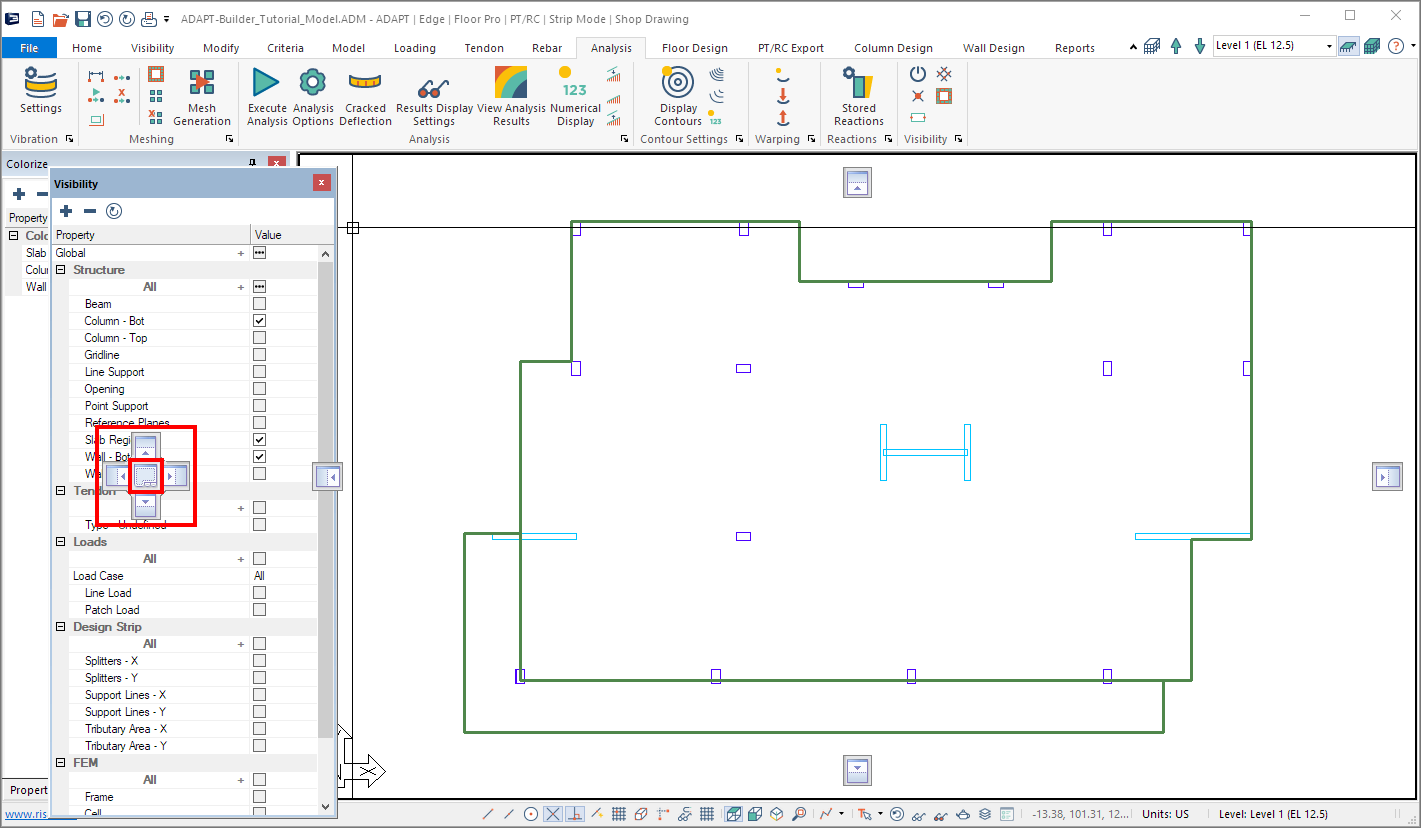
As you hover the dragged panel over an icon, a blue transparent box shows the layout the icon represents. This transparent box is also an indicator that you can release the mouse button if you want the floated panel to be docked in this position.
If docking a panel to a grouped panel set, as you hover the floated panel over the tabbed icon, the floated panel may temporarily disappear, leaving just your mouse pointer directly over the tabbed icon. When this happens, you can simply release the mouse button to dock the floated panel as part of that grouped panel set.
Release the mouse button to dock the floated panel.
The panel is docked in the position you chose.

Click on image to enlarge
Note that when you dock a panel in a grouped panel set, its tab is placed to the right of the tab for the panel that is currently open in that grouped set. This is by design. If you want to move the new tab to a different position in the tabs row, follow the instruction in step 4.
(Optional) To change the position of a tab at the bottom of a grouped panel set, simply drag the tab horizontally, to the left or right. In our example we dragged the Visibility tab left, to move it in front of the Colorize tab.

Click on image to enlarge
This method can be used only to move a single tabbed panel from its current grouped set to another grouped panel set, a stand-alone panel to create a new grouped panel set, or to dock it it by itself in a different position. Before you can move and dock the tabbed panel, you must first pull it out of the grouped panel set it is currently docked in.
To move a single, tabbed panel from its current docked position to another docked position:
Drag on the tab of the panel you want to dock elsewhere, to pull it out of the grouped panel set it is currently docked in.

Click on image to enlarge
Drag the panel so that your mouse pointer is directly over the icon that represents the position you want to use.

Click on image to enlarge
As you hover the dragged panel over an icon, a blue transparent box shows the layout the icon represents. This transparent box is also an indicator that you can release the mouse button if you want the floated panel to be docked in this position.
For the tabbed icon position, as you hover the floated panel over the icon, the floated panel temporarily disappears, leaving just your mouse pointer directly over the tabbed icon. When this happens, it indicates that you can release the mouse button if you want to dock the floated panel as part of a grouped panel set.
Release the mouse button to dock the floated panel.
The panel is docked in the position you chose. In our example, we chose to dock to the top, inside position of the work area. Notice how the new docked panel is positioned above all other panels within the work area.

Click on image to enlarge
(Optional) To change the position of a tab at the bottom of a grouped panel set, simply drag the tab horizontally, to the left or right. In our example we dragged the Visibility tab left, to move it in front of the Colorize tab.
Click on image to enlarge
When moving and merging a tab panel into another grouped panel set, you can either dock it using the docking position icon or by adding it to the tabs at the bottom of the grouped there are two methods you can use for docking; drag the panel to the tabs in the grouped panel where you want to dock it or drag it until you see the docking position icons and then click on the tabbed (the middle) icon.
This method can only be used to dock a floating panel, as this method only docks the panel to the last docked position it held, before it was floated.
To dock a floating panel to its last docked position:
Right-click on the heading label of the floating panel, to open the right-click menu.

Click on image to enlarge
Choose Docking from the menu.
The panel is re-docked to the same position it was last docked prior to being floated.

Click on image to enlarge
The ADAPT-Builder Auto Hide feature works as a toggle, allowing you to turn on and off the automatic hiding of docked panels. When Auto Hide is selected for a panel that is docked in the grouped panel set, all the panels are automatically hidden when you choose to auto-hide on any one of the panels. If you want to hide just a single panel in a grouped panel set, see Hide a Panel instead. Only docked panels can be automatically hidden, so you'll need to ensure a panel is docked before selecting the Auto Hide feature.
To automatically hide a panel:
Right-click on the Label at the top of the panel, to open a menu.

Click on image to enlarge
Choose Auto Hide from the menu.
The panel automatically collapses, as shown in the following image.

Click on image to enlarge
To view an auto-hidden panel, rollover or click on the green dot or the panel's label.
To reset a panel to remain open:
Right-click on the Label at the top of the panel, to open the menu.
Choose Auto Hide, to toggle the automatic hide feature off.
Auto Hide is turned off and the panel remains open.
When you hide a panel, it actually closes that panel until you select to reopen it from its associated ribbon panel. Regardless of whether a panel is floated or docked, it can be closed using the Hide feature. When closing panels in a grouped panel set, you need to close each one individually; they cannot be closed all at once.
To hide (close) a single panel:
Right-click on the Label at the top of the panel, to open a menu.

Click on image to enlarge
Choose Hide from the menu. Alternatively the user can click the close ![]() icon for the panel they are on to close the panel.
icon for the panel they are on to close the panel.
The panel is closed and must be reopened from its associated ribbon, if you want to view it again.
To reopen a closed panel:
Open the ribbon associated with that specific panel.
In our example, we closed the Properties grid panel, so we opened the Visibility ribbon.
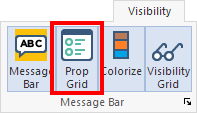
In the appropriate section, click on the icon of the panel you want to reopen.
In our example, we chose to reopen the Properties grid (Prop Grid) panel.
The panel is opened in the last position it had been in prior to it being closed. If it was floating, it will open as a floating panel; if it was docked in a grouped panel set, it reopens in that set; if it was docked by itself to a side of the model editor or work area panel, it will reopen in that same docked position.