
Defining wall piers is a requirement in the process of performing wall design in ADAPT-Builder. Creation of wall piers and their assignment to Individual or Multiple walls is required to produce grouped wall reactions for design objectives like foundation analysis and design, overturning checks, etc. ADAPT-Builder provides additional Wall Pier Result capabilities for determining reactions and geometrical properties for groups of walls that are physically and analytically interconnected.
The creation of Wall Piers within ADAPT-Builder is completed in the Pier Label dialog window. The Pier Label dialog window can be accessed from the Wall Design > Settings>Define Pier Labels icon.
The image below shows the Pier Label dialog window.
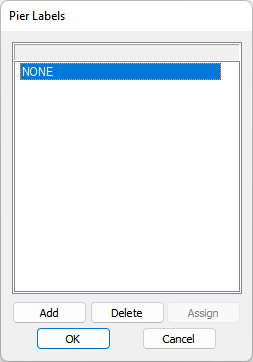
Go to Wall Design ribbon and click on the Define Pier Labels  icon.
icon.
In the Pier Label dialog window click on the Add button one time for each unique pier in your model. In this example we clicked the Add button three times.
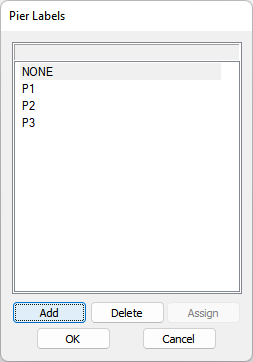
ADAPT-Builder automatically gives each pier a label name of PN where N is sequential starting from 1. You can modify the label names by double clicking on them and typing a new name on your keyboard.
Once all piers are defined, click OK to exit the Pier Labels dialog.
Wall piers are commonly defined as those walls contained in one composite group for the purpose of acting as a lateral resisting component in the global lateral resisting system. In the example image below the model contains three wall piers acting as lateral resisting elements and grouped such that all design sections are referenced to the same wall pier.
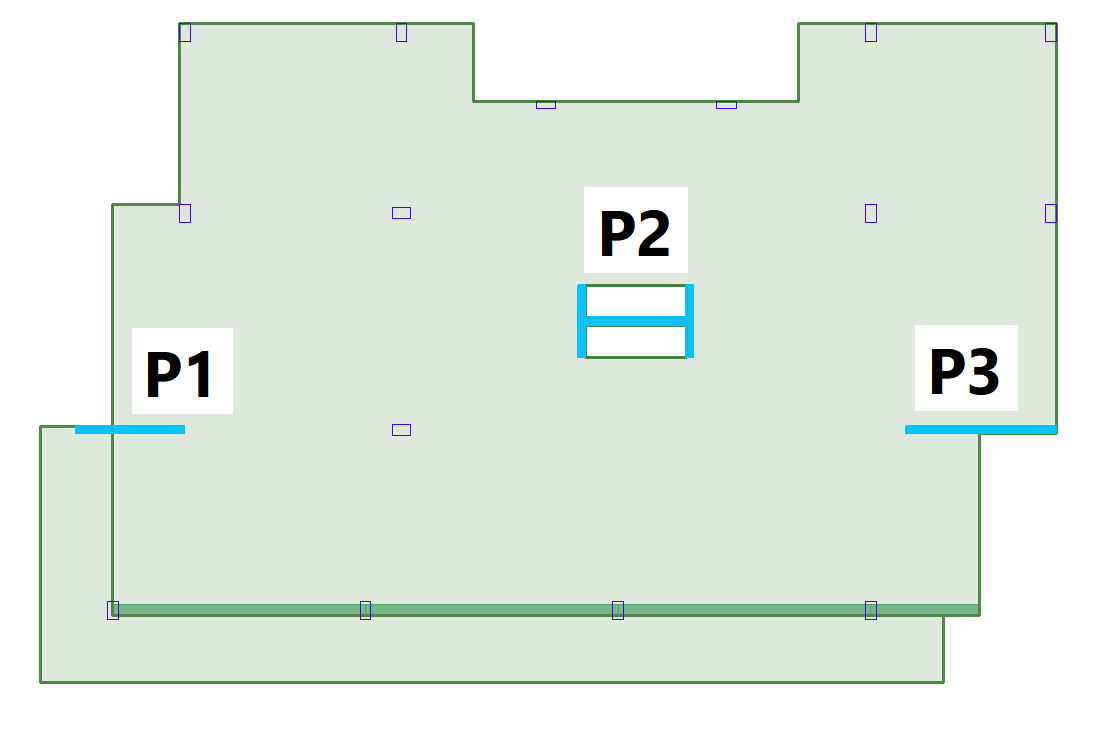
Click on image to enlarge.
To assign wall piers individually:
Left-click on a wall to select the wall you want to assign to a wall pier.
In the Properties Grid > General section click on the Pier Type drop down menu and select the pier label you want the wall assigned to.

To assign multiple walls to wall piers:
Click on the Multi-Level Mode icon ![]() in the Level Manager toolbar to ensure you are in multilevel.
in the Level Manager toolbar to ensure you are in multilevel.
Click the Top View icon ![]() in the Bottom Quick Access toolbar.
in the Bottom Quick Access toolbar.
Click the Walls Only  icon located on the Wall Design ribbon.
Use the window selection tool by clicking the left mouse button and dragging the cursor such that the selection window contains the walls you want to select.
In the Properties Grid > General section click on the Pier Type drop down menu and select the pier label you want the wall assigned to the group of selected walls.
Click on image to enlarge.
Repeat step 4 and 5 for as many wall stacks as necessary in the model. The image below shows a colorized view of the model with completed wall pier assignments.
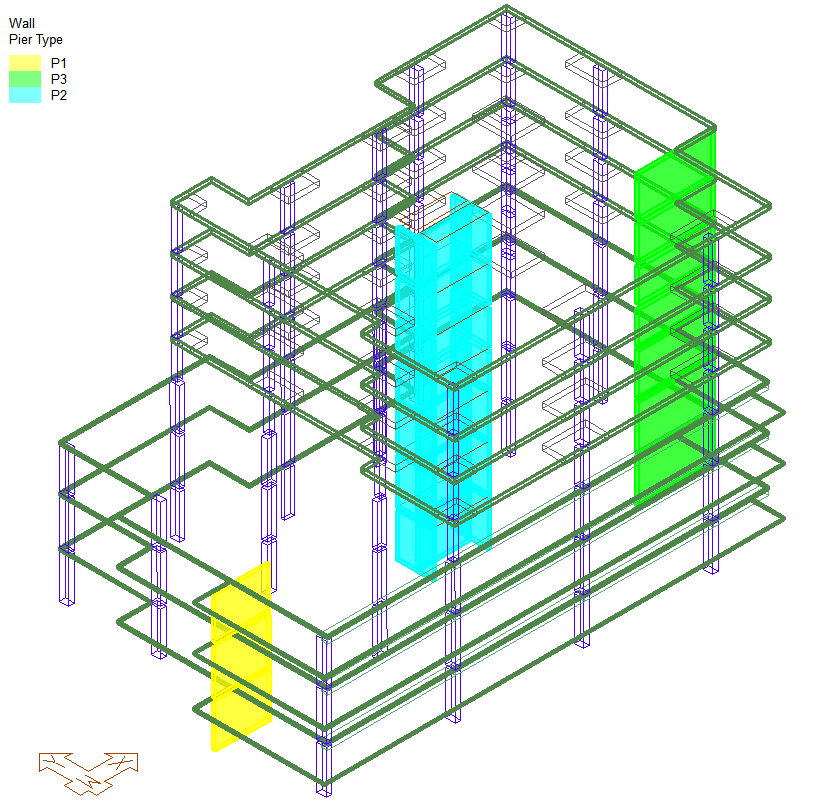
Click on image to enlarge.
After completion of the analysis of a model, wall pier results can be produced. Note these results are different than those for the design of wall design sections and are primarily the wall pier geometric and physical properties as well as pier reactions for the last run model analysis. Wall pier results can be produced Graphically or as a Microsoft Excel® data file in .XLS format.
To view graphical wall pier results:
Graphical pier results are selectable in the Result Viewer selection tree under the Pier section.
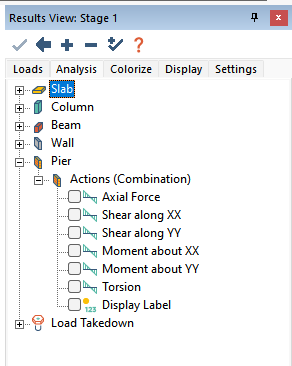
Available options to view graphically are:
Axial Force – Reports the axial force for the wall pier at the pier centroid
Shear along XX – Reports the shear in the global X direction for the wall pier at the pier centroid
Shear along YY – Reports the shear in the global Y direction for the wall pier at the pier centroid
Moment about XX – Reports the moment about the global X axis for the wall pier at the pier centroid
Moment about YY – Reports the moment about the global Y axis for the wall pier at the pier centroid
Torsion – Reports the pier torsion for the wall pier at the pier centroid
Display Label – Displays the assigned pier wall for each wall in view.
The image below shows the Axial force in the wall piers.
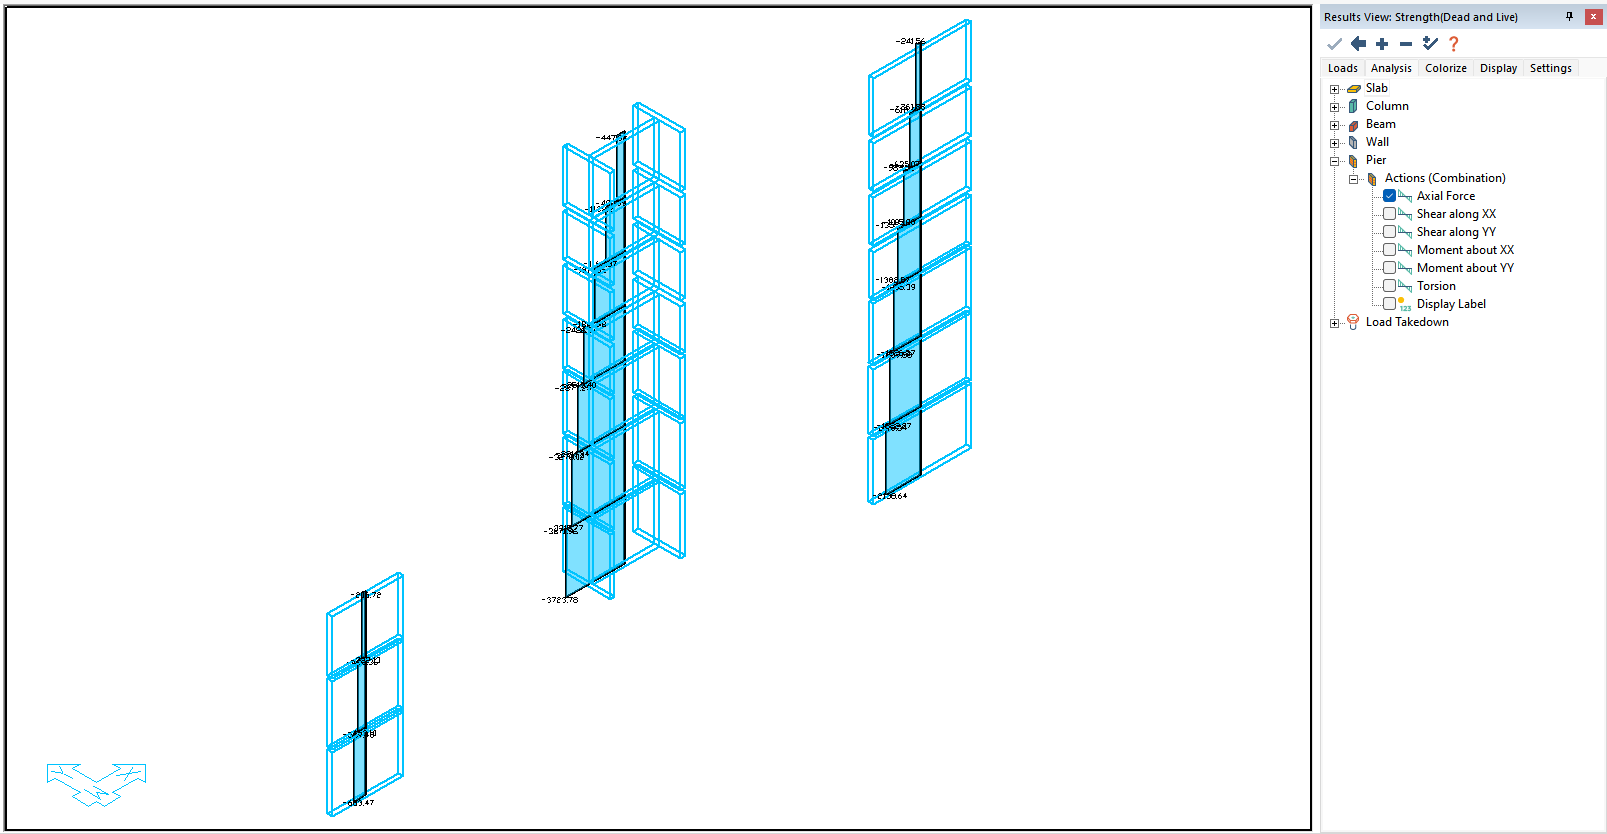
Click on image to enlarge.
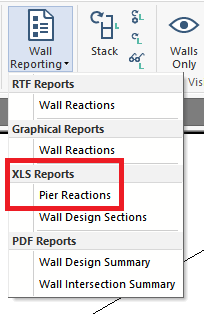
To create the wall pier XLS report:
To produce the wall pier reaction report
Go to Wall Design>Wall Reporting>XLS Reports>Pier Reactions.
Select the Pier Reactions to be reported in the Report Options dialog window that opens. Note that you can also choose to produce the reaction report relative to a user-defined orientation angle which transforms the shear and moment values
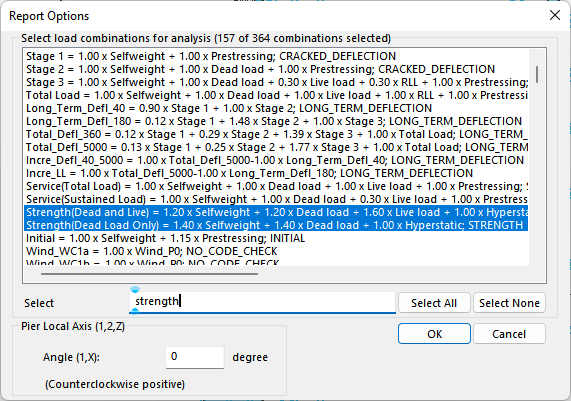
Click on image to enlarge.
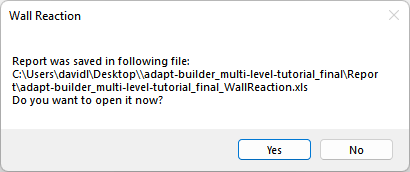
Click OK to produce the report. The program will produce a message showing where the XLS file is saved and ask the user to open the file at that time.
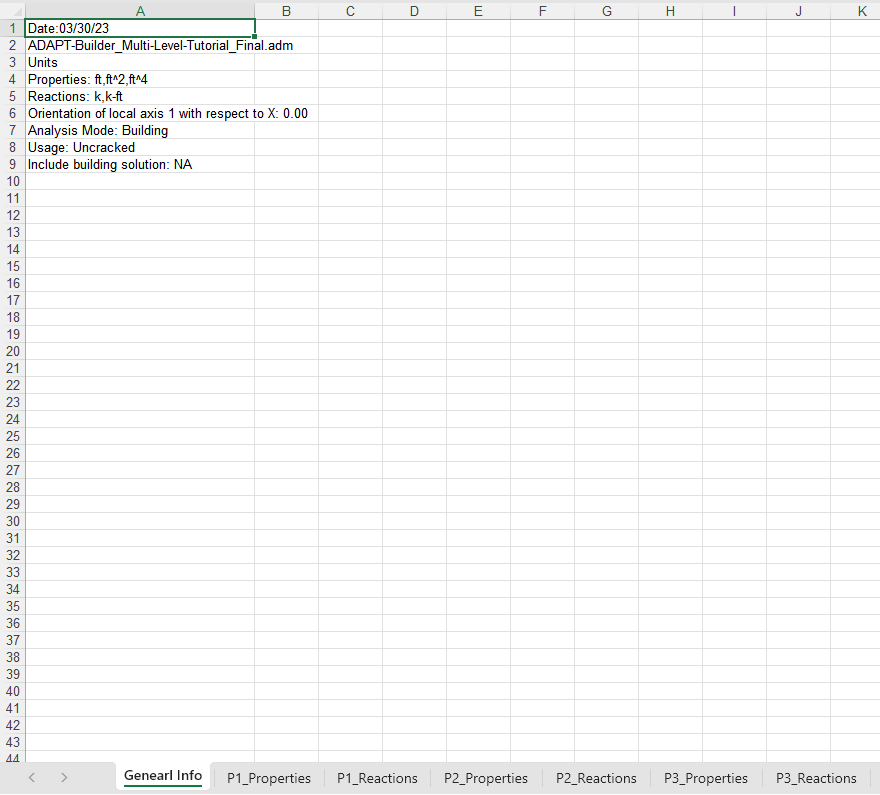
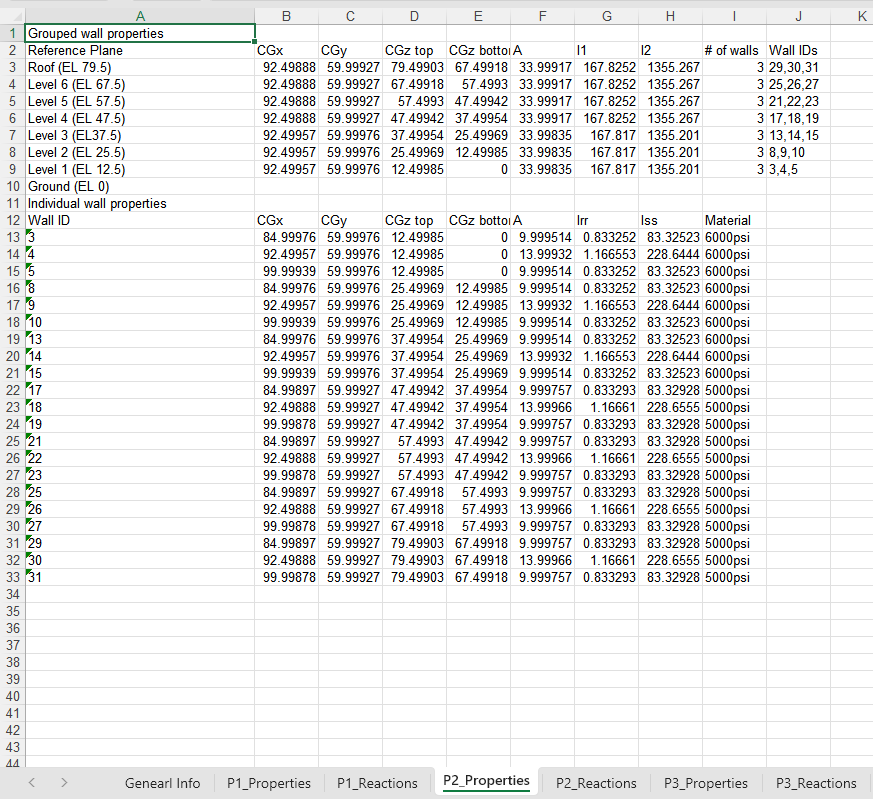
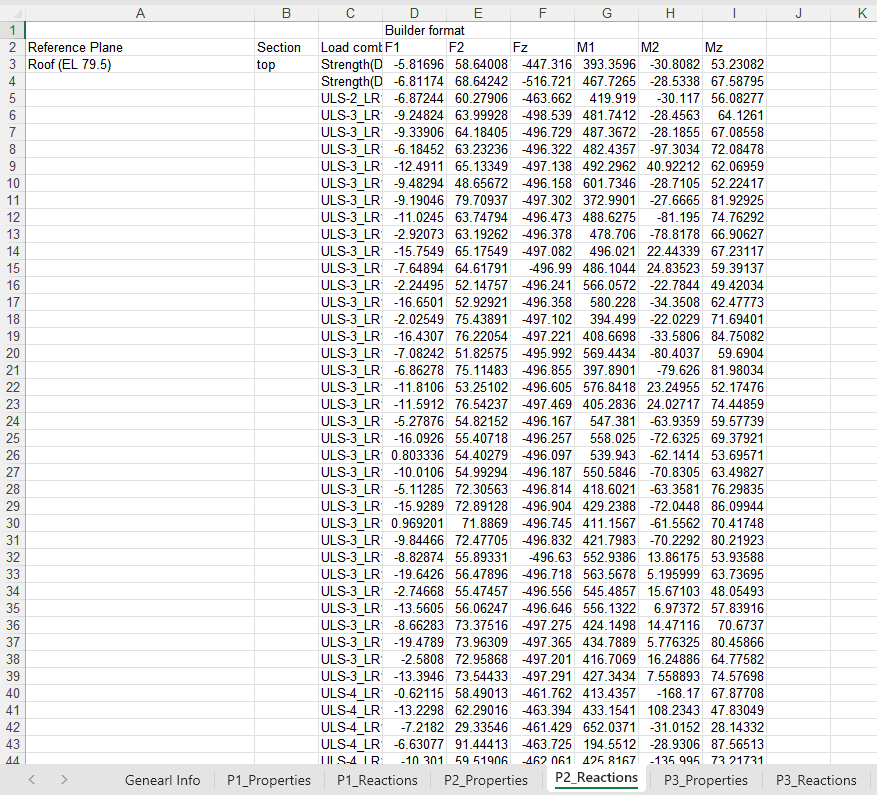
The figures below show examples of the pier reaction data report. These include General Information, Pier Properties, and Pier Reactions. Each pier defined in a model will have its own set of data.
General Pier Information:
Click on image to enlarge.
Pier Properties:
Click on image to enlarge.
Pier Reactions:
Click on image to enlarge.