selection will open RISAConnection and all connections that are supported and selected will be brought in.
The RISA-Tekla link sends the geometry, connection loads, shape types and connection types automatically from Tekla Structures into RISAConnection. This allows you to design your connections in RISAConnection and then bring the results back into Tekla Structures to have your structure updated and to view the results.
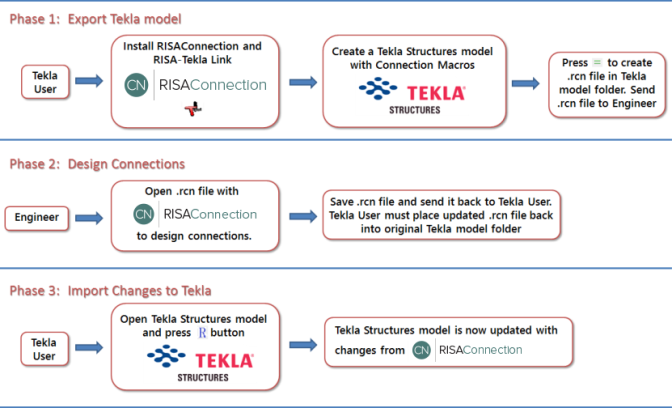
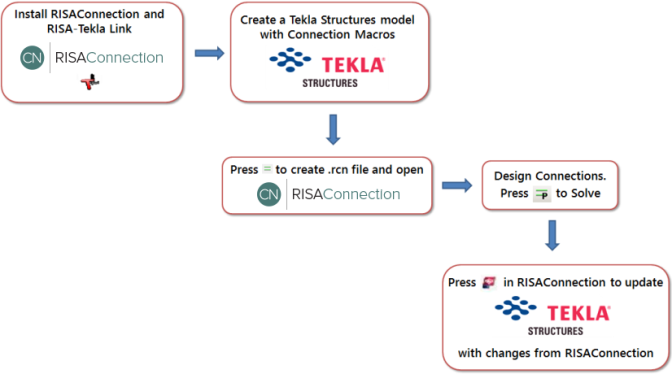
Here we will walk through the steps required to design connections using this integration.
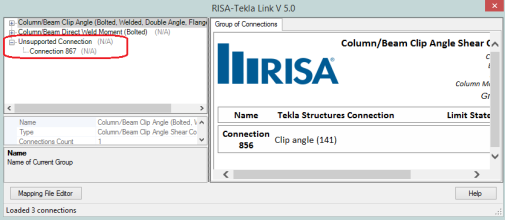
You must first model your structure in Tekla Structures, including the connections and the loading. RISA only supports specific connections with the RISA-Tekla link. This list can be found in the Before You Begin topic. If a connection is not one of these supported connections then it will show up as an Unsupported Connection in the RISA-Tekla link.
For information on loads see the RISAConnection Behavior topic.
After the model is completed in Tekla pressing the RISA - Design Connections selection will open RISAConnection and all connections that are supported and selected will be brought in.
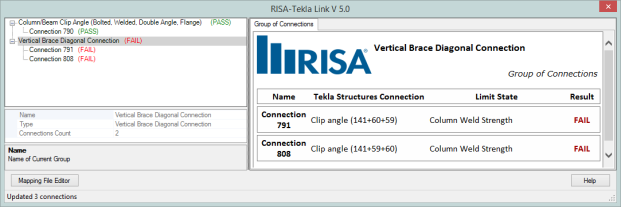
Any connections that are not brought in will be shown in the RISA Tekla Link window that becomes available as soon as the link is run.
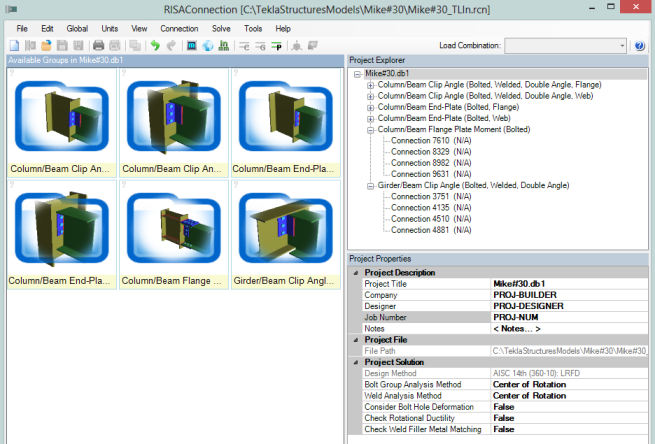
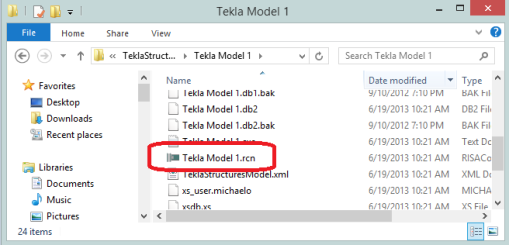
At this time the RISA-Tekla link will create a file with a .rcn extension in the model folder:
Note:
.selection and then choose the connections you wish to transfer from the list.

In RISAConnection you can configure many of the properties of the connections using the RISAConnection interface. See the RISAConnection help file for more information on how the RISAConnection interface works.
Note:
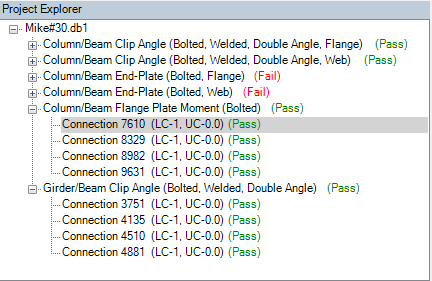
Once the configuring is complete you can then press any of the Solve buttons:  to solve either a single Connection, Group or the entire Project. This will show a Pass or Fail for each of the connections and allow you to adjust properties to pass the connection.
.
How you get back to Tekla Structures from RISAConnection is dependent on whether the connections were manipulated with RISAConnection on the same machine as Tekla Structures or on a different machine.
 button to transfer back to Tekla Structures.
 selection in Tekla Structures. DO NOT press the RISA - Design Connections
  button as this will overwrite your RISAConnection model again with the properties from Tekla Structures.
In either of the above cases this will do two things:
For more information on this dialog see the Application Interface topic.
A green cone indicates a passing connection:
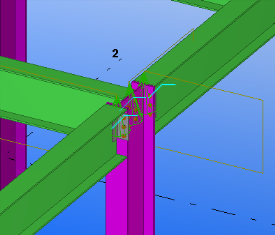
A red cone indicates a failing connection:
The RISA - Roundtrip Design Connections  selection will do a full round trip between Tekla Structures and RISAConnection. Steps 2 through 4 would all be done automatically. This means that the model will be sent to RISAConnection, any applicable connections will be checked/solved in RISAConnection, and the model will then be exported back to Tekla Structures. Be very careful using this tool, as many changes can potentially happen to the Tekla Structures model that may not have been directly specified by the user. RISAConnection has limitations and these are imposed on the Tekla connections as well, which can cause automatic updates to the connection. This is NOT recommended for the first time solution in RISAConnection, as it will make many automatic changes with no real warning. However, if you have manually transferred to RISAConnection a few times and want a quick solution again then this button can be valuable.
If the Tekla Structures computer will also be using RISAConnection, use this workflow:
If the Tekla Structures computer will be different than the one using RISAConnection, use this workflow: