Aluminum - Databases
Shapes are organized in the database by country. The shapes available are from the ADM 2005 Section Properties section. You may type in the names directly, select shapes from these databases or add your own shapes.
Aluminum Databases
RISA currently supports the following two common Aluminum databases:
-
Aluminum US
-
Aluminum CAN
Select an Aluminum Database
To select an aluminum database when drawing a new member:
-
Click the Material Type
 down-arrow in the Properties panel and choose Aluminum.
Click on the image to enlarge it
-
Click the Section/Shape
down-arrow and choose the Shape Database.
Click on the image to enlarge it
-
Click the Shape
 ellipses button to open the Shape Selection window (shown in the following image).
Click on the image to enlarge it
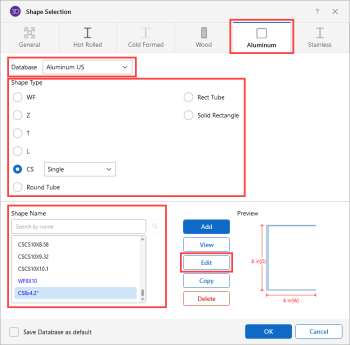
The Shape Selection window opens to the Aluminum tab.

Click on the image to enlarge it


To select an aluminum database from the spreadsheets:
-
Click the Aluminum tab of the ‘Section Sets’ spreadsheet or the Primary tab of the ‘Members’ spreadsheet.
Section Sets spreadsheet - General
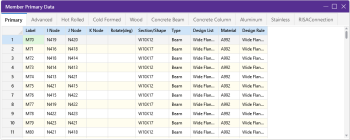
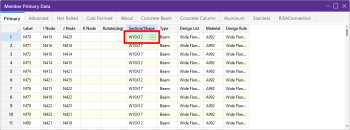
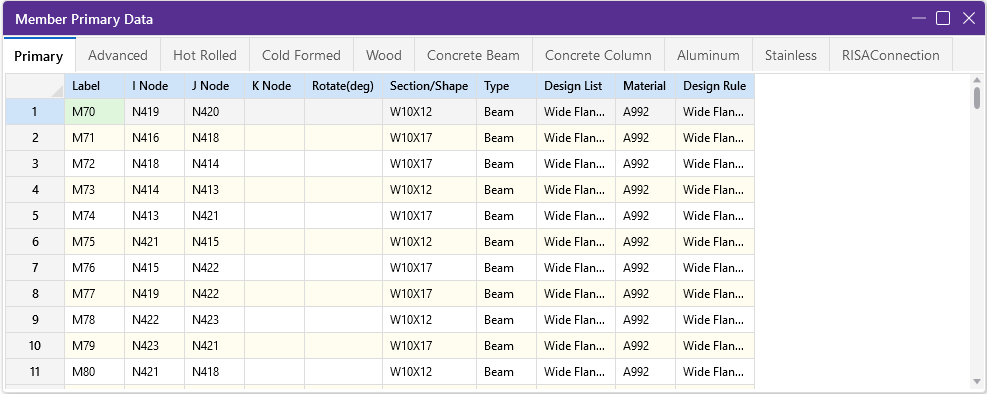
Member spreadsheet - Primary

Click on the image to enlarge it
Click on the image to enlarge it
-
Click on the Shape or Section/Shape cell of the row you want to work with, then click the
ellipsis button that appears (shown in the following images).Section Sets spreadsheet - Aluminum tab
Member spreadsheet - Primary tab

Click on the image to enlarge it
Click on the image to enlarge it
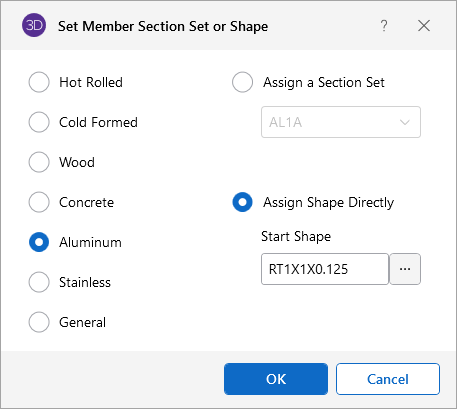
The Shape Selection: Aluminum or Set Member Section or Shape window opens, depending on which spreadsheet you clicked the ellipsis button in.
Shape Selection: Aluminum window
Set Member Section Set or Shape window

Click on image to enlarge it

Click on image to enlarge it


Select an Aluminum Shape
To select an aluminum shape from the Shape Selection window:
-
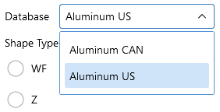
Click the Database
down-arrow and choose the database where the shape is stored.RISA currently supports two common Aluminum databases: Aluminum US and Aluminum CAN.
-
Click on the Shape Type you want to select from.
If you select CS, you also have to click the down-arrow and choose a layout.

-
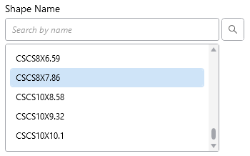
In the Shape Name list box, click on the name of the shape you want.
To narrow the scope of names appearing in the list box, begin typing the name in the search box.
As you type, the scope of the list is filtered to show only those names that match what you are typing.
-
Click OK to select the shape and close the Shape Selection window.
Shape Database Files
The aluminum shape databases are stored in the files ADMdbUS32.fil and ADMdbCAN32.fil.
Add a Database Shape
To add a database shape:
-
Click the Shape Database
 icon, on
the ‘Advanced’ ribbon (as shown in the following image).
icon, on
the ‘Advanced’ ribbon (as shown in the following image).
Click on image to enlarge it
The Shape Selection window opens.

Click on image to enlarge it
- Click the Aluminum tab.
-
Click the Database
down-arrow and choose the database where you want to store the new shape (as shown in the previous image).RISA currently supports two common Aluminum databases: Aluminum US and Aluminum CAN.
-
Click on the Shape Type you wish to add, then click the Add button (as shown in the previous image).
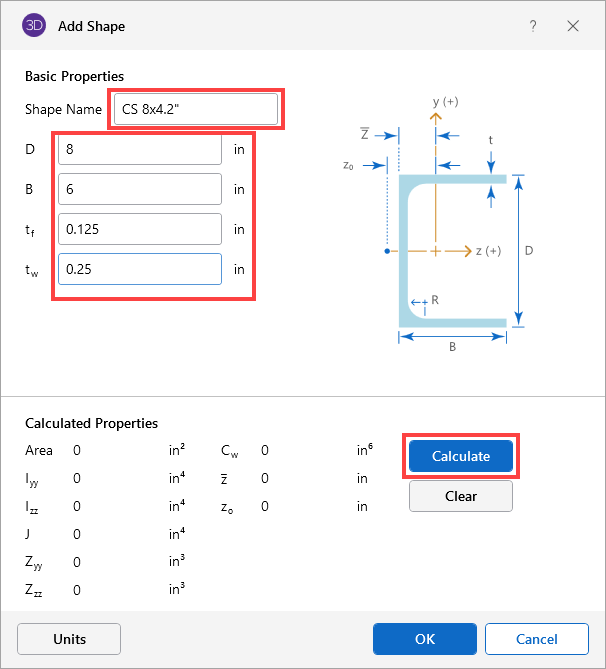
The Add Shape window opens.

Click on image to enlarge it
- Type a Shape Name for the shape.
- Enter in the Basic Properties (D, B, tf and tw).
-
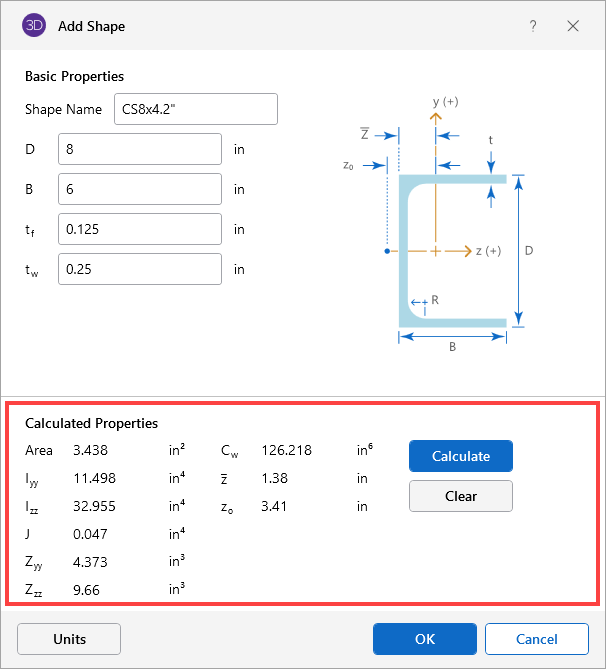
Click Calculate to determine the shape properties.
The Calculated Properties section displays the results from the calculation (as shown in the following image).

Click on image to enlarge it
If you are satisfied with the results, save the new shape.
-
Click OK to save the shape and close the Shape Selection window.

Edit a Database Shape
To edit a database shape:
-
Click the Shape Database
icon on
the Advanced ribbon(as shown in the following image).
Click on image to enlarge it
The Shape Selection window opens.
Click on image to enlarge it
- Click the Aluminum tab.
-
Click the Database
down-arrow and choose the database where you want to edit the shape. -
Click on the Shape Type of the shape you want to edit, if not already selected.
-
Click on the Shape Name of the shape you want to edit, then click the Edit button.
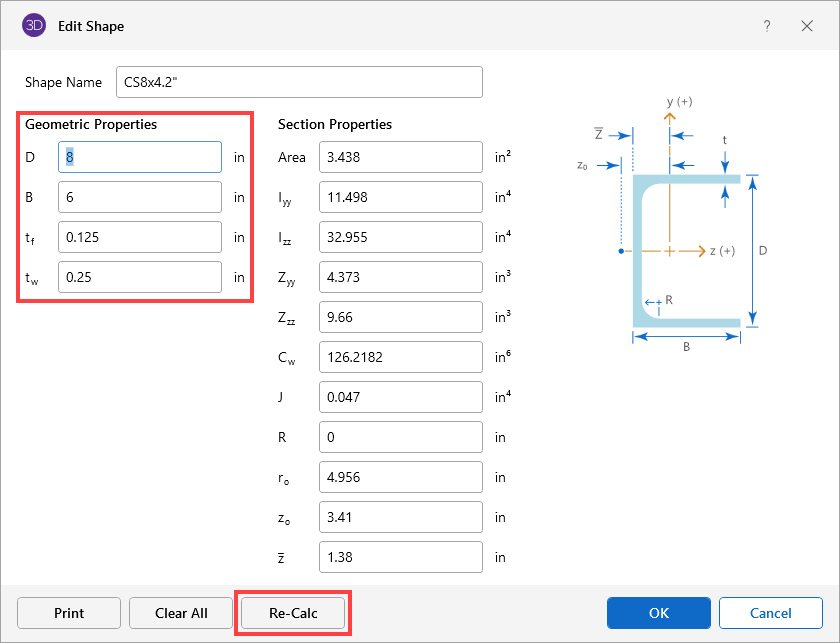
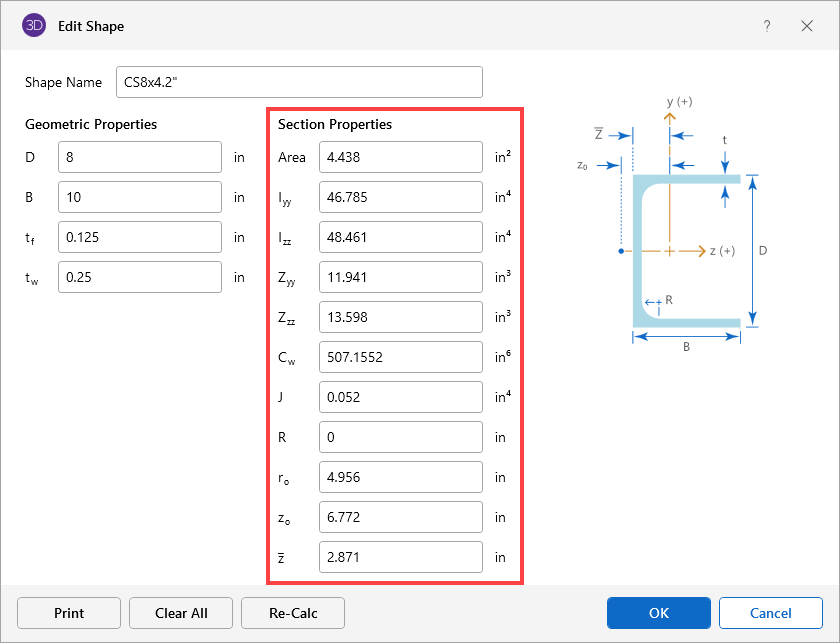
The Edit shape window opens.
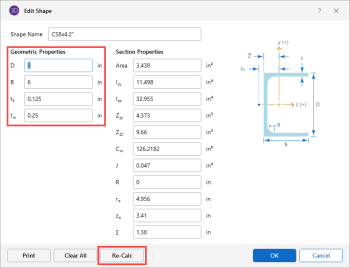
Click on image to enlarge it
You have the option to input ‘Geometric Properties’ and ‘Section Properties’ manually, or you may choose to have the program calculate the Section Properties based on values input for the Geometric Properties.
-
Make your Geometric Properties changes, then click Re-Calc to have the program calculate the Section Properties automatically.
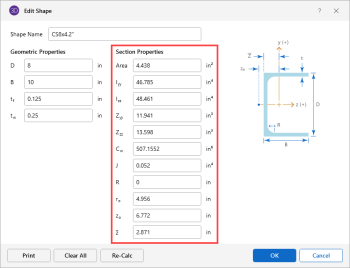
Click on image to enlarge it
-
Click OK to save the shape change(s) and close the Edit Shape window.
You are returned to the Shape Selection window.
-
Click OK to save the change to the Shape database and close the Shape Selection window.

- New shapes are added to the bottom of the database in a blue font to show they were not originally from the default database.
- To delete a shape, specify the database and shape type you wish to delete and then click the Delete button.
- Only shapes added to the default database (shown in blue) are able to be edited or deleted.
Aluminum Shape Types
There are ten types of aluminum shapes. Names for each shape type follow the convention of the manufacturer for each shape. If you know the shape name, you can type the name directly into the Shape field on the spreadsheets, or use the search box to type part of the name to narrow the scope of names displayed in the Shape Name list.
WF sections
The wide flange shapes are called out by the designation given them in the aluminum manual. For example, if you wanted to use a WF10x11.4 you would enter WF10X11.4 as the shape name in the database shape field. Aluminum Association Standard I-Beams(AA), American Standard(S), Army-Navy(A-N), Canadian(CAN) I-Beams and Wide Flange shapes are available.
Zee sections (Z)
The Z shapes are called out by the designation given them in the ADM manual.
Tee sections (T)
The T shapes are called out by the designation given them in the ADM manual. Army-Navy (A-N) shapes are also available.
Solid Rectangular
The Solid Rectangular sections or bar sections are defined by the user, there are no default shapes.
Angles sections (L)
Angles are entered with an "L" prefix. The syntax is "longXshortXthick", where "long" is the long leg length, "short" is the short leg length, and "thick" is the thickness, in number of decimals. For example, L5X3X0.375 is a 5" by 3" angle 0.375" thick. Square End Angles (LS) shapes are also available.
Channel sections (CS)
The CS shapes are called out by the designation given them in the ADM manual. The Aluminum Association (AA), American Standard Channels (C) and Car and Ship Building Channels (CS), Canadian Channels (CAN) are available.
Double Sections
The CS shapes are also available Back-to-Back or Front-to-Front orientation.
Round Tube or Pipe (OD or NPS)
The Round Tube shapes are called out by the designation given them in the ADM manual. The Outer diameter call out is used as well as the Nominal Pipe Size.
Rectangular Tube sections (RT)
The RT shapes are called out by the designation given them in the ADM manual.