Create a Custom Snapshot of a Model
RISAFoundation includes an Image Capture tool on the View ribbon that allows you to create a custom snapshot of a model and save it.
To create a custom snapshot:
-
Click the
 Snapshot icon on the Quick Access Toolbar.
Alternatively, you can:
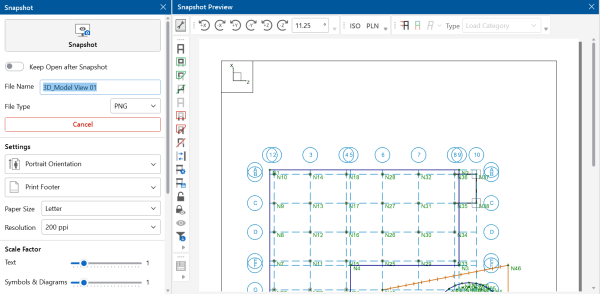
A Snapshot Preview opens on the right, with a Snapshot panel to its left.
Click on image to enlarge it
-
(Optional) For information on printing the snapshot, please see Printing.
-
To save the snapshot:
-
Type a name for the snapshot you are saving in the File Name box in the Snapshot panel.
-
Click the File Type drop-down arrow and choose the image format to save the snapshot in.
-
(Optional) To keep the Snapshot and Snapshot Preview panels open after capturing the snapshot, click the Keep Open after Snapshot toggle (it turns blue when selected).
-
-
Click the Snapshot block in the Snapshot panel.

A Snapshot Created message briefly appears.
- If the model has yet to be solved, the image is created in the Model Data Files location from File > Application Settings > File Locations.
- The relative path of the image file is saved with the model. If the model file is moved, remember to move the associated Images folder as well so that all saved views and snapshots will still be available.

