Import DXF Grid
Import DXF lets you import a DXF drawing into the model view as a grid. The DXF image is imported so that you can snap to any point or intersection to aid in the drawing of your model. The DXF Import Drawing Grid supports Lines, Polylines, Circles, Arcs, Polylines with Arcs and Points.
To Import a DXF Drawing Grid:
- Go to the Drawing Tools ribbon.
-
Click on the Type drop-down and choose DXF Underlay.
Click on image to enlarge it.
The following table provides information on the various related Drawing Grid settings.
DXF Import Drawing Grid Settings
Setting
Description / Explanation
.dxf Plane
This setting lets you choose the DXF drawing plane to import from the DXF file. The DXF file will be flattened to this plane and all lines/points visible from this plane will be imported.
.dxf Scale Factor
This setting lets you enter the scale factor that will cause the DXF file to be scaled up, or down to full scale.
For instance, if you have created a scaled model in AutoCAD at a scale of 1/4"=12", then the appropriate scale factor to produce a full size RISAFoundation model would be 48. The default is 1.0.
.dxf Units
This setting lets you choose the same units you used in the CAD model from which you produced the DXF file. The supported DXF units are none, inches, feet, mm, cm and meters.
Angle Increment
The program breaks an arc or circle into straight line segments to allow you to snap to them.
This setting indicates the number of degrees that an imported arc or circle should be broken into.
-
Assign the DXF import options like Scale Factor, Units and Angle Inc., as well as the .dxf Plane.
-
Click on Import .dxf Grid.
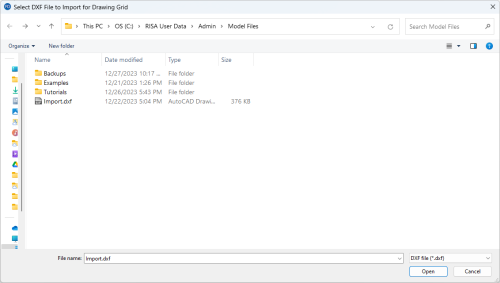
The Select DXF File to Import for Drawing Grid window opens.
Click on image to enlarge it.
-
Choose the DXF file to import and click Open.
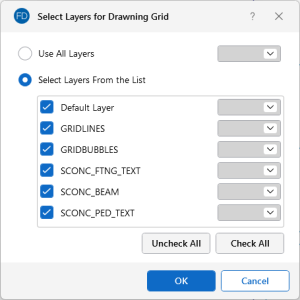
Once the file is imported, a Select Layers for Drawing Grid window opens.
Click on image to enlarge it.
The default option is to Use All Layers.
- Choose whether to Use All Layers or Select Layers from the List.
-
If you chose Select Layers From the List, check the layers you want and uncheck those you don’t want.
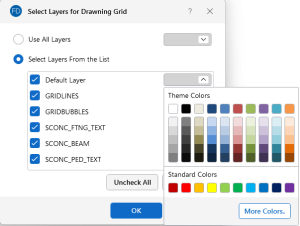
You can select the color of the grid lines/points from the color box next to each layer name.
-
(Optional) Click on a layer’s color box arrow to select a color other than the gray default.
Click on image to enlarge it.
- Click OK to save your choices and close the window.
-
Set the Drawing Grid Origin, or use the drop-down menu to select Click to Locate origin.
Locating the DXF Drawing Grid
The origin of the drawing grid may be specified in two ways. The first way to specific the origin is to enter the exact global coordinates for the origin. This can be done by entering the values in the X and Z fields of the Grid Origin section. The second option is to specify the origin by clicking on an existing point in the model. This option is available by selecting the Click to Locate Origin option from the drop-down menu, clicking the OK button, and then clicking on the specific location in the model view where you wish the drawing grid origin to be located. After you have browsed for your file, the drawing grid origin will then be set to this point.


