Design Strips/Cuts
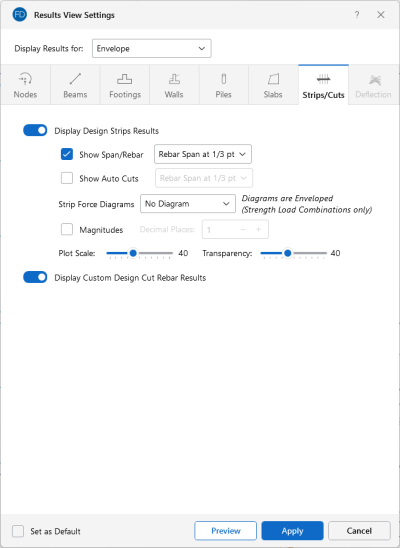
Access the graphical Results View Settings for design strips or cuts by clicking the Results icon in the View Settings section of the View ribbon and selecting the Strips/Cuts tab.
Click on image to enlarge it
Clicking the Display Design Strip Results slider (to make it turn blue) will display Design Strip Results in the model view.
Select the Show Span/Rebar check box to toggle on the display of the rebar layout. You can choose where you want the span/rebar label to display from the drop-down menu.
Select the Show Auto Cuts check box to toggle on the display of cuts automatically made by the program during solution. You can choose where you want the auto cut labels to display from the drop-down menu.
The Strip Force Diagrams drop-down menu lets you choose the enveloped forces to be plotted on each design strip. Include the display of force magnitudes by checking the Magnitudes check box and control the number of Decimal Places using the drop-down menu. You can also control the graphic scaling of these force diagrams using the Plot Scale slider bar. The diagrams can be presented with varying degrees of Transparency, with 100% transparency meaning only an outline of the force diagram is displayed and 0% indicating a solid fill.
Clicking the Display Custom Design Cut Rebar Results slider (to make it turn blue) will display Custom Design Cut Rebar Results in the model view.
For additional advice on this topic, please see the RISA Tips & Tricks webpage at risa.com/post/support. Type in Search keywords: Graphics.
