


Design for seismic connection detailing is now available in RISAConnection and you can use the connection rules within RISAFloor and RISA-3D to export a RISAConnection model. The integration will import the connection forces (and seismic detailing results) into RISAConnection for seismic moment frame connection design.
From RISA-3D:
-
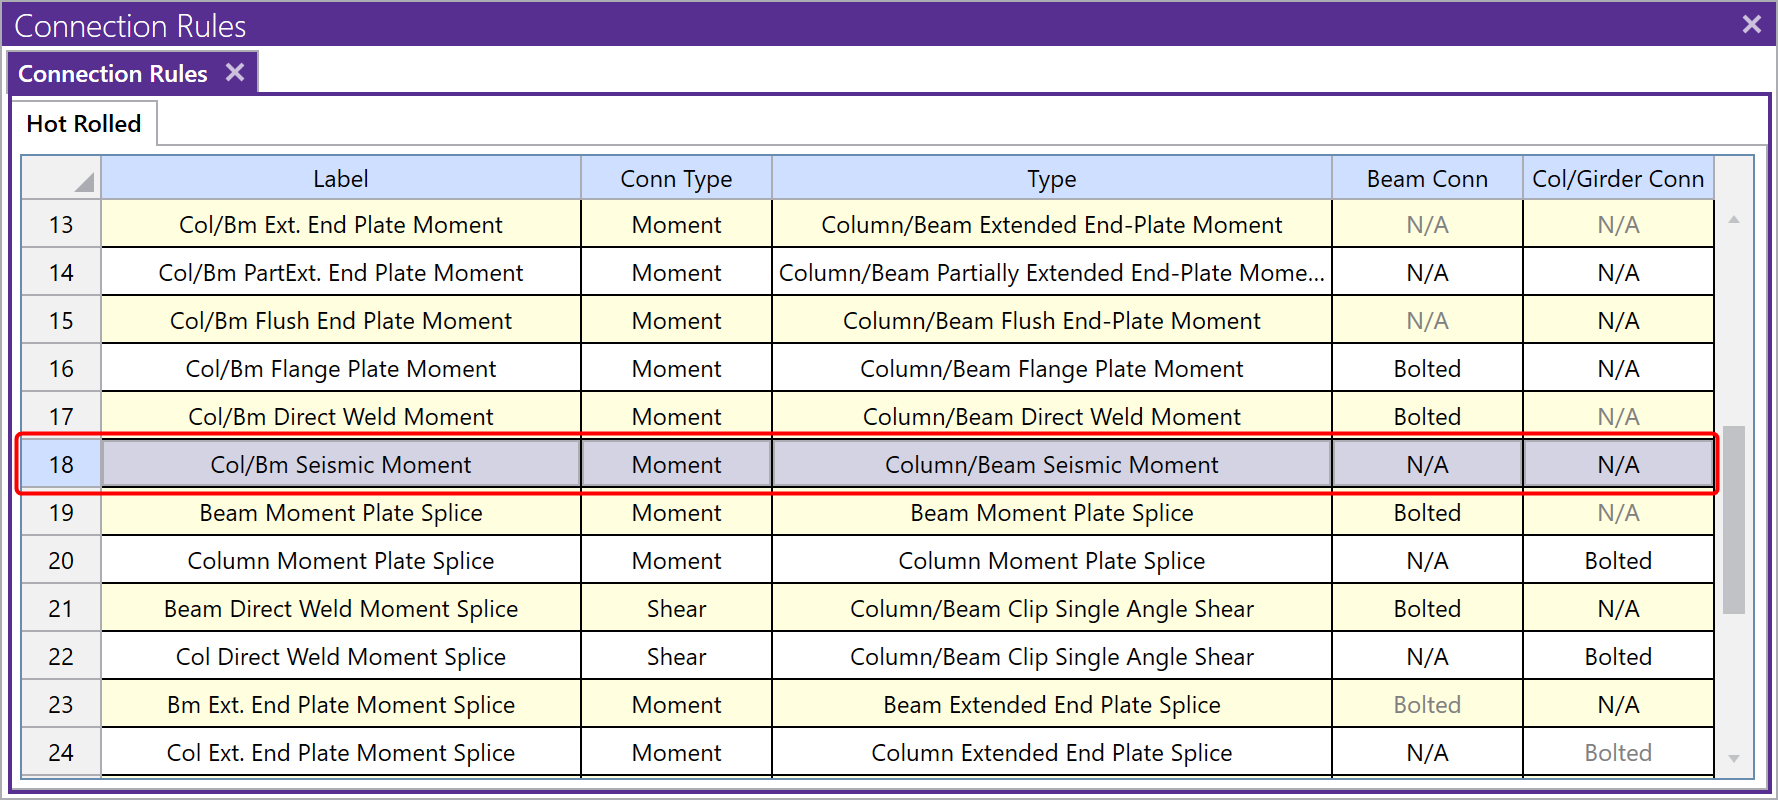
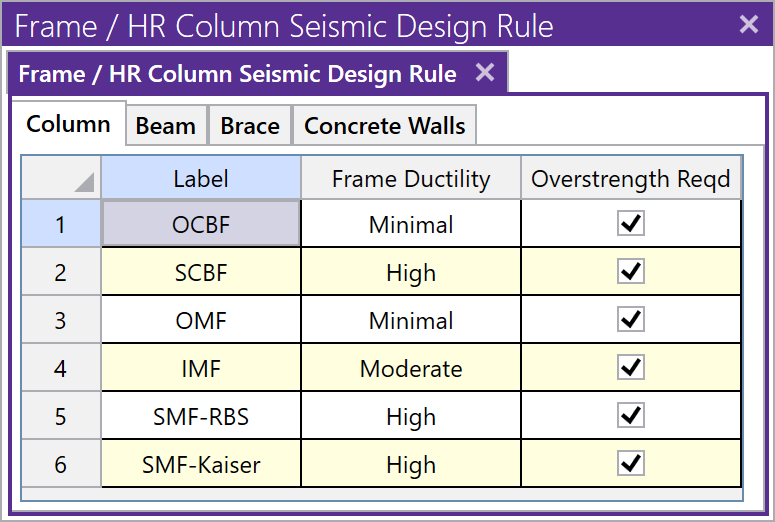
First, you must apply both a “Column/Beam Seismic Moment” connection rule and a seismic design rule to the member (beam) within RISA-3D.
-
Next, solve the RISA-3D model in order to review your seismic detailing results. If you do not have seismic detailing results in RISA-3D, then the information cannot be exported to RISAConnection. For more information about seismic detailing results, see the RISA-3D Help file topic “Seismic Detailing“.

-
Use the Director tool to export the model into RISAConnection.
-
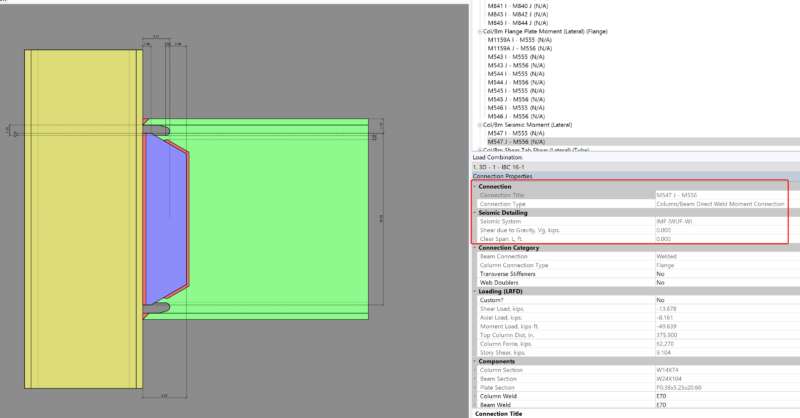
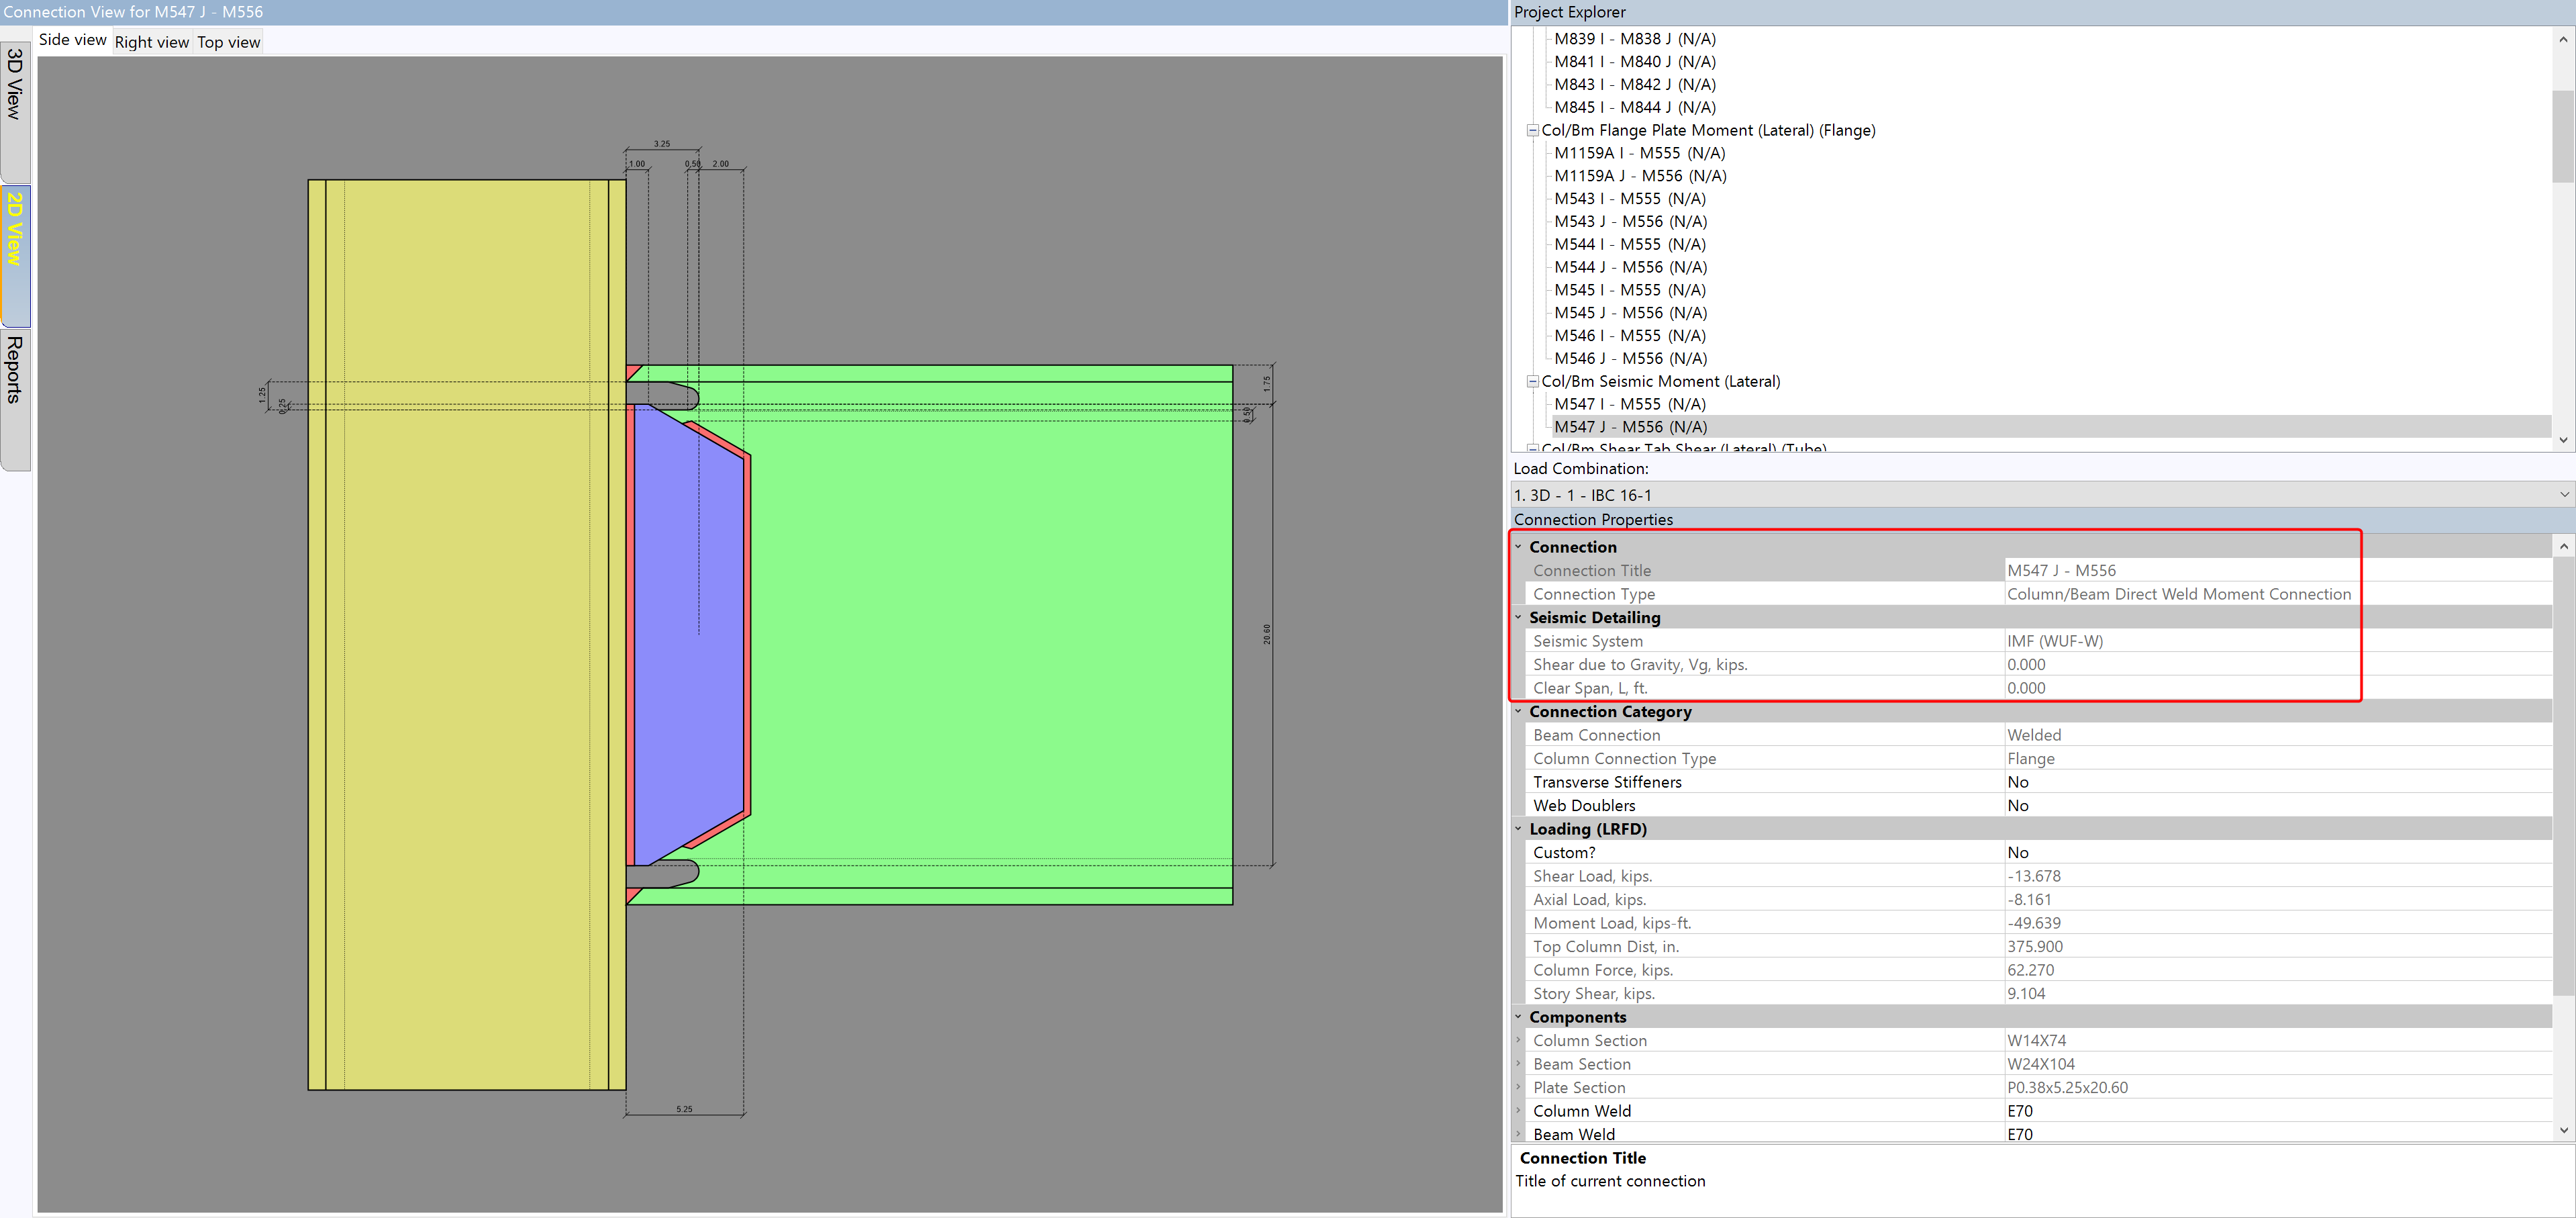
When exported into RISAConnection, the program will determine the connection type, seismic system, and seismic input values based on the applied RISA-3D seismic design rule and the RISA-3D solution results. Once in RISAConnection, these cannot be changed.
From RISAFloor:
-
Apply the “Seismic Moment” connection rule to lateral members with RISAFloor (see above) or in RISA-3D.
-
Solve the model in RISAFloor and use the Director tool to take the model into RISA-3D.
-
Apply the Seismic Design Rule (see above).
-
Solve your lateral load combinations in RISA-3D in order to get your seismic detailing If you have not done this, the connection will not export to RISAConnection.
-
Use the Director tool to export the model into RISAConnection.
-
When exported into RISAConnection, the program will determine the connection type, seismic system, and seismic input values based on the applied RISA-3D seismic design rule and the RISA-3D solution results. Once in RISAConnection, these cannot be changed.